The alert box: Part 1 of 5 on popup windows
Learn about the most useful built-in dialogs and how to create custom dialogs.
By Thom Parker – June 7, 2008


Scope: All Acrobat versions
Skill Level: Beginner and Intermediate
Prerequisites: Familiarity with the Acrobat JavaScript environment
Popup Windows (dialogs) are an important component of Acrobat interactivity. Popup Windows provide the user with error messages, warnings, and other key information. They ask the user questions and collect input. Acrobat has several types of built-in Popup Windows (alert, response, and file open), as well as functions for creating custom dialogs.
The Alert Box
The Alert Box is by far the most used dialog because it performs the most common operations. It displays short text messages (errors, warnings, etc.) and asks yes/no questions. Try it out by running the following code in the JavaScript Console.
app.alert("Hello World", 3);
This statement displays a Popup Window with the words “Hello World” and an info Icon (Figure 1).
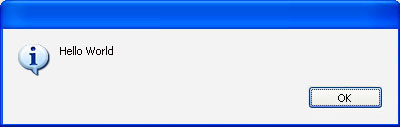
Figure 1 – Alert Box used as an information popup
The first argument to the app.alert() function is the message text and the second argument is the index number of the icon (Table 1). The Alert Box above can be changed into an Error, Warning, or Question by simply changing the icon’s index number.
Besides the icon and message text, the Alert Box has input arguments for dialog button combinations (see Table 2), the window title, the associated document object, and an optional check box. The full argument list is shown below.
app.alert(cMsg, nIcon, nType, cTitle, oDoc, oCheckbox);
cMsg is the text displayed in the body of the Popup Window, and this is the only required argument. The nIcon argument is the icon displayed to the left of the text, nType is the button combination, and cTitle is the window caption. These are the most common, and easy to use, arguments. The last two, oDoc and oCheckbox, are more awkward to work with and are for rarely used operations.
| Icon | nIcon Argument | Description |
|
| 0 (default) | Error Message |
|
| 1 | Warning Message |
|
| 2 | Question |
|
| 3 | Information Message |
|
| 4 | No Icon displayed |
Table 1 – Alert Box Icons
| Buttons | nType | Description |
|
| 0(default) | Single value Ok Button |
|
| 1 | 2 value Ok/Cancel Combination |
| | 2 | 2 value Yes/No Combination |
|
| 3 | 3 value Yes/No/Cancel Combination |
Table 2 – Alert Box button combinations
The arguments oDoc and oCheckbox are a bit more mysterious than the others. The oDoc argument forces the Alert Box to run in the context of a different PDF document. This option is used for multiple document applications. It is an advanced topic so it won’t be covered in detail here.
The oCheckbox argument adds a checkbox to the bottom of the Alert Box. Its usage is more complicated than the other options. In order for it to return a value it requires a generic object literal as input. This object contains 3 properties, the checkbox text (cMsg), an initial value (bInitialValue), and the output value (bAfterValue). The output value is the only required property. The others are optional and have default values. The following code displays a simple warning message with a check box. It includes all the code used in a field validation event. The result is shown in Figure 2.
// Test field value for numeric value
event.rc = !isNaN(event.value);
if(!event.rc && !this.hideWarning1) {
	// Only show alert box when hideWarning is undefined or false
	// First setup the check box object literal
	var oCk = {bAfterValue:false};
	// Display Alert box
	app.alert({cMsg:"Input value must be numeric", nIcon:1, oCheckbox:oCk});
	// Set hideWarning to value of checkbox, for next time
	hideWarning1 = oCk.bAfterValue;
}
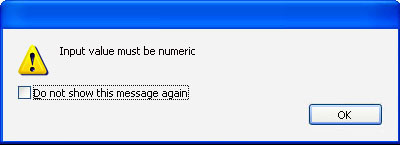
Figure 2 – Alert Box warning with default check box message
Notice the arguments to app.alert() are specified differently here than in the previous example. In this object notation each argument is a named member of an object literal that is passed into the function. This is an Acrobat JavaScript specific notation, not a general JavaScript thing. It allows us to ignore parameters we are not interested in. It allows the Acrobat engineers to create functions with absurd numbers of input arguments, like submitForm() and addWatermarkFromText(), without causing scripters to get finger cramps from having to type several lines of code for a single function call.
Notice also that even though a check box message wasn’t specified in the code, one appeared, i.e., “Do not show this message again.” The checkbox is typically used to give the user the option of not displaying the dialog the next time, so this is the default text. However, the checkbox is just another option and could be used for anything. The following code uses all the checkbox properties to create an alert box for other reasons. The results are shown in Figure 3.
// First, setup the Check Box object literal
var oCk = {cMsg:"Yes, I want to get the newsletter", bInitialValue:true, bAfterValue:false};
// Display Alert box
app.alert({cMsg:"Thank you for filling out the form", nIcon:3, oCheckbox:oCk});

Figure 3 – Alert Box using all the checkbox properties
Here’s one more example. This one asks the user a question and uses the Yes/No button combination to collect the user input. The result is shown in Figure 4.
var nRslt = app.alert ("Not all fields are filled in\n\n" + "Do you want to continue?";, 2, 2, "Submit Validation");
if(nRslt == 4) {
	// User Pressed Yes, Do submission //this.submitForm(...);
}
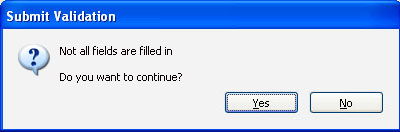
Figure 4 – Alert Box used to ask a question
In this example the value returned by the app.alert() function is used to determine whether or not to continue data submission. Each of the 4 Alert Box buttons returns a different value (Table 3).
| Return Value | Button Pushed | |
| 0 |
| Ok |
| 1 |
| Cancel |
| 2 |
| No |
| 3 |
| Yes |
Table 3 – Alert Box return values
In practice, the Alert Box is pretty easy to use both for giving the user a quick message and getting a simple response.
Download an example
Several working examples are provided in this PDF file.
Download ["PDF","27 KB"]
Related topics: |
JavaScript |
Top Searches: |
Edit PDF create PDF Action Wizard |
Try Acrobat DC
Get started >
Learn how to
edit PDF.
Ask the Community
Post, discuss and be part of the Acrobat community.
Join now >
0 comments
Comments for this tutorial are now closed.
Comments for this tutorial are now closed.