![]()
3D Reviewer in Acrobat 9—A moving experience
By Doug Halliday – October 31, 2009
Acrobat 9 Pro Extended is a very robust rich “product suite." In addition to Acrobat, Pro Extended includes Livecycle Designer for forms design, Adobe Presenter for training and 3D reviewer, a robust 3D tool set. In this article, I will review some of the features of 3D Reviewer. I will address features such as moving parts and sub-assemblies (hence the title), configurations, call-outs and export. These will help you do more with 3D PDFs.
Click below to learn about these features.
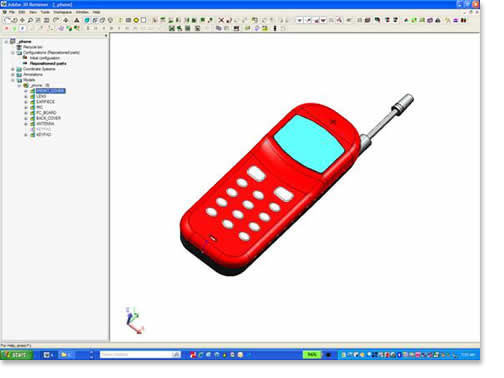
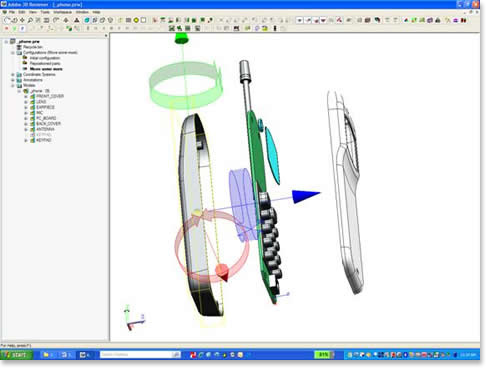
Let’s start by opening 3D Reviewer. 3D Reviewer can be launched separately from Acrobat Pro Extended or opened by right clicking any 3D window and selecting “Edit in 3D Reviewer." Here is what the 3D Reviewer user interface looks like:
Now, I know this is a little hard to see in this image, but don’t worry, I will help you navigate. I imported this phone assembly as a precise, b-rep model by simply dragging the assembly onto the scene graph much the same way as I might do in Acrobat Pro Extended. Let’s look at the model tree.
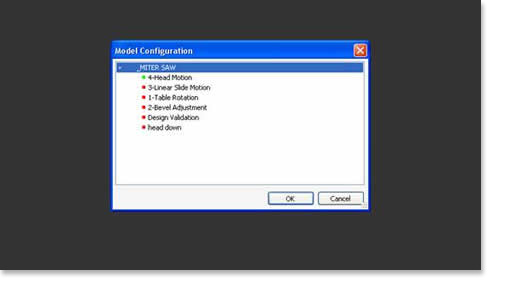
As you see, we have the model tree expanded a bit. Notice some of the parts such as the front cover, lens, and so forth. In a little while we are going to work with those parts. Also notice that there are configurations that can be saved. Let’s start there. Configurations are similar to views. They allow saving “states” of the model. We will start by locking the initial configuration, as shown below. In this case, I have simply expanded “configuration”, selected the initial configuration and simply right clicked it.

Then I clicked “lock configuration”. Now I will be able to return to that configuration whenever I wish.
For our next step, we will add a configuration by right clicking again or by selecting the add configurations icon from the toolbar. The icon is the little symbol with the plus sign underneath. The two symbols to the right with arrows underneath can be used to page forward and backward through configurations you save.

I renamed this configuration “Repositioned Parts." Now I will move some of the sub-assemblies around. Here is how:
I start by selecting the sub-assembly I want to move. I can select the parts from the 3D annotation or the model tree. I’ll move the front cover first.
Now I will choose the technique I want to use to move the front cover. I have selected the move tools icon. The move tools are hidden behind the icon showing two boxes and an arrow pointing from one to the other.
A dialog box pops up showing me options for moving parts. I have several methods available to me to move the parts. They include point-to-point, along axis, rotate around axis , move from axis to axis, move with coordinates, rotate with angles and mirror. I will select “along axis." I have moved the part along the z-axis and clicked apply. I will leave it to you to experiment with all of the other methods.
Now let's lock that configuration and add another. I’ll call this one “add some more." This time I will use the drag and drop tool to move the back cover. Let’s try it. The drag and drop tool icon is next to the move tools icon and looks like a little coordinate system with some arrows. Of course, you can also select from the tools pull down menu.

Now I will drag and drop by selecting the axis.
Notice that I could have rotated the parts, chosen any axis and easily positioned everything as needed. Let’s do one more thing. I’ll add a callout to the part we just moved.
Here is how I can do that:
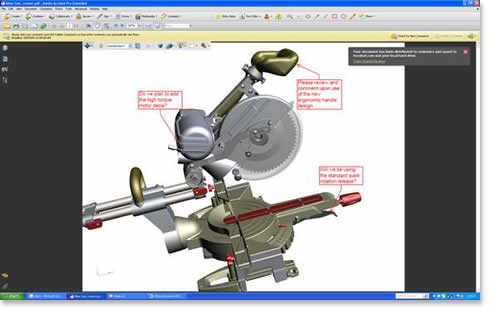
Select the rear cover and then click the 3D Mark Up icon. Notice I can select various attributes from the part file and add them to the mark up.
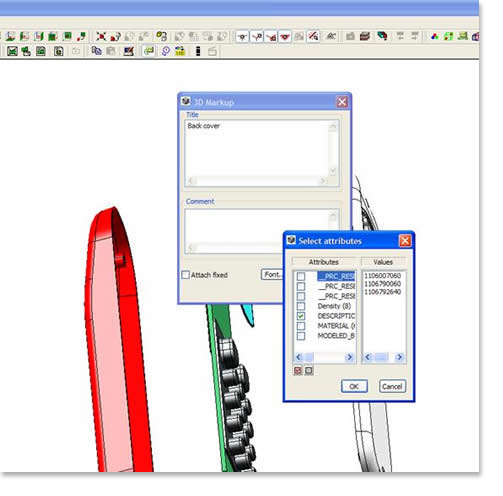
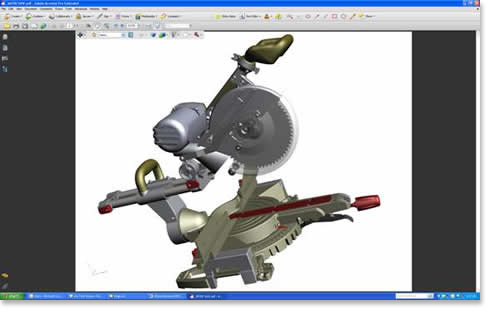
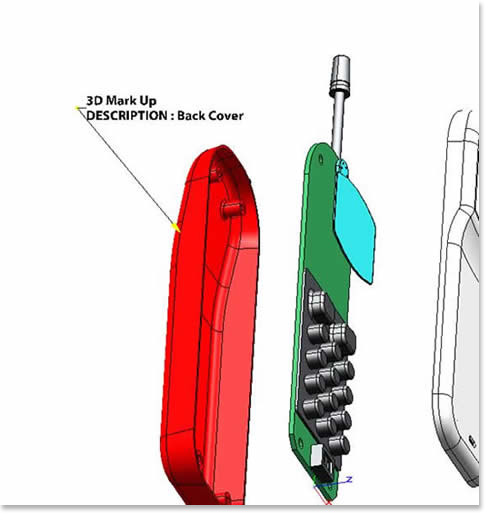
I just click “OK” a couple of times and I’m all set. Let’s lock this last configuration. Here’s our 3D mark up:
Now that we have created these configurations, let's export this file. I am going to export as a PDF. All I need to do is select file -> export, chose PDF as the file type, click save and I’m done. There are some options I could have chosen at this point to select the “contents” of the PDF. In my case, I selected “PRC B-rep plus Tesselation” and left the other option settings alone. Below is the PDF we created, complete with all of the views, which are the same as the configurations we created earlier.
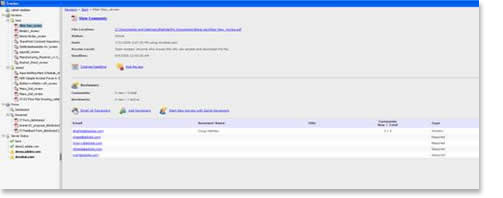
Here is the result showing the PDF open in Acrobat:

Let’s stop here. Next time we will explore some more 3D Reviewer features.