![]()
Acrobat 9 and CS5: The BIG picture
By Donna Baker – April 6, 2010 Donna Baker
The world is abuzz with news of the CS5 product releases. And why not? World-class products with exciting new innovations are newsworthy. In the coming weeks and months, you’ll find hundreds of articles detailing new functionality and workflows. But what does the release of CS5 mean for Acrobat users?
I’m not going to discuss some of the ground-breaking technologies and features you’ll find in the new products, such as the Content-Aware Fill in Photoshop CS5, or the new Flash features, such as the Text Layout Framework (TLF) text engine. Instead, I’ll concentrate on some of the features that have an impact on how we use and interact with PDF and Acrobat.
The new CS Review service runs via Acrobat.com, and allows users to comment directly on a program-specific file from InDesign, Illustrator or Photoshop CS5.
Participating in CS Review
A CS review, unlike regular PDF-based reviews, uses a snapshot of your content. The snapshot is uploaded to your personal workspace on Acrobat.com. You can add comments in the browser or the CS Review panel in the application. Unlike PDF-based reviews, the CS Review is available for free for the first year only, at which time it becomes a subscription service.
You need to log into Acrobat.com either before or initiating the process. Assuming you’re already logged in, follow these steps to start a CS review:
- Open the file you want to use for the review. Click the CS Review button on the application bar and choose Create New Review (Figure 1).
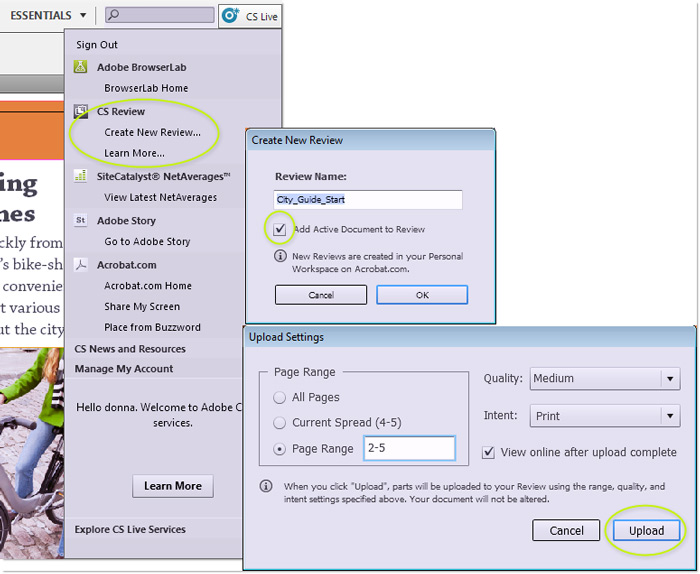
Figure 1: Configure and upload a snapshot for a new CS Review. - Specify a name for the review, or leave the default based on the file’s name. Click OK to open the Upload Settings dialog box.
- Specify the details for the review in the dialog box. You can define a page range, quality and whether to use Print or Web intent. An Illustrator snapshot lets you choose an Artboard range.
- Tip: The Print intent displays with overprint previews turned on. Viewing the snapshot at 100 percent matches the print size, depending on the display resolution. The Web intent shows the snapshot sans overprint preview, and uses the pixel dimensions specified in the document’s setup.
- Click Upload to transfer the snapshot to your personal workspace on Acrobat.com. Each page, spread, image or artboard is defined as a part.
Participants add comments to the snapshot in several ways (Figure 2).
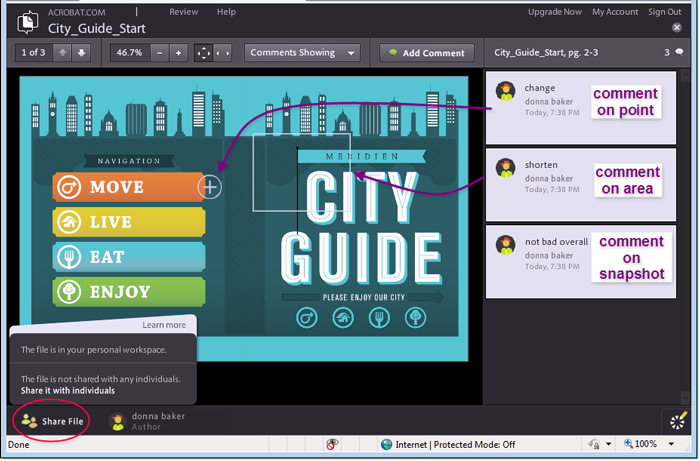
Figure 2: Configure and upload a file snapshot for a new CS Review.
Add simple comments to either the part, an area or at a specific point:
- Click Add Comment to include a comment that applies to the entire snapshot
- Drag a marquee with the cursor and release the mouse to display a comment popup field
- Click a point on the page to add a callout to a specific area and type a comment in the popup
Note: InDesign CS5 lets you comment on text as part of the new tracking process—click and drag the cursor to select the text and open a comment popup.
Back in your source program, open the review from the CS Review panel. You can toggle the snapshot displays and see details about the comments (Figure 3).
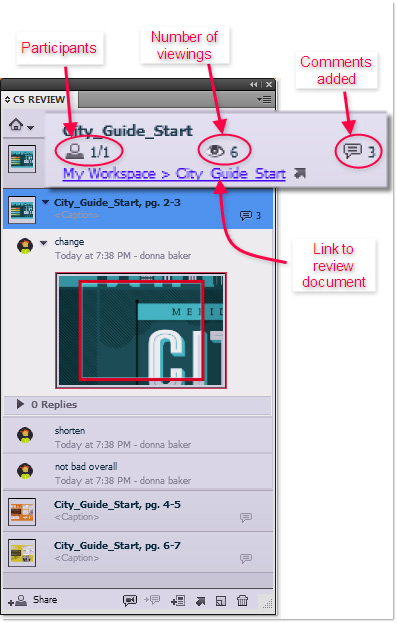
Figure 3: View and manage the comments in the CS Review panel.
More interesting program features
I discovered additional features in InDesign that are sure to improve your PDF-based workflows.
InDesign CS5
InDesign CS5 continues to blur the lines between the designer and the Flash developer. Each release since CS3 has expanded the capabilities, from simply placing a SWF file in CS3, to exporting FLA data in CS4. CS5 includes a much-expanded set of tools and features for producing multimedia and interactive content that can be exported to PDF.
InDesign CS5 lets you export PDF files as a background task, great when you need to export a large file yet continue to work on another project or document. Choose Window > Utilities > Background Tasks to open the panel and then choose File > Adobe PDF Presets and pick your export option. Once the export starts, you’re ready to continue working on your next deadline (Figure 4).

Figure 4: Background exporting lets you get on with your work.
Note: Background exporting doesn’t work with interactive PDF files.