![]()
Changing another field with combo box (drop down) selection
By Thom Parker – December 7, 2006
Scope: All Acrobat Full versions (not Standard)
Skill Level: Beginner
Prerequisites: Familiarity with Acrobat
Selections from a Combo, or DropDown Box, are often used to modify a PDF form in some way. For example, pre-populating or hiding a block of form fields, resetting lists, changing how calculations are done, etc. Using Combo Boxes like this is an excellent way to create dynamic and interactive documents. Unfortunately, the way Acrobat Events work can make this a slightly confusing task to set up. But, with a little knowledge Combo Boxes really are easy to work with.
The Selection Change Event
The Combo Box is a combination of two other field types- the Text Edit Box and the List Box, so it shares characteristics of both. It receives a whole series of events for keystrokes, selections, validation and formatting. The Combo Box Properties Dialog (Figure 2) has locations (tabs) to enter scripts for all these events. For this tip only a single event is needed (the Change Event) since it is only necessary to know when a new selection has been made.
The Change Event is the same as the Keystroke Event. This is the same event used with the Text Edit Box. In both Lists and Combo Boxes this event is triggered when the user makes a selection. In the following example the Change Event is used to pre-populate a set of form fields.
Example
The following two files are provided with this tip.
Combo Test Start
This document is the starting point for the example. It contains all the necessary form fields, but none of the JavaScript code. To get started, open this file first.
Download [PDF, 72 KB]Combo Test Completed
This is the completed example with all the code.
Download [PDF, 72 KB]
Setting up the Combo Box:
1. Activate the “Select Object Tool” from the Advanced Editing toolbar as shown in Figure 1.
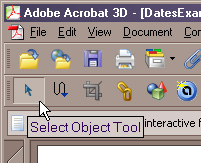
Figure 1 – Activating the Select Object Tool
2. Locate the Combo Box with the name “DepartmentNames” and double click on it to display the Combo Box Properties Dialog (Figure 2).
3. Select the Options tab (Figure 2).
4. We want to see the results of the user’s selection when it happens, so check the “Commit selected value immediately” option, (Figure 2). Otherwise, the selection change is not detected until the user takes the focus off the Combo Box by clicking on, or tabbing into, another field.

Figure 2 – Setting up the Combo Box Options
5. Select the Format tab (Figure 3).
6. From the “Select format category:” drop down list, select “Custom,” (Figure 3).
7. Click on the Edit button for the “Custom Keystroke Script:,” (Figure 3).

Figure 3 – Entering a Selection Change (Keystroke) Script
8. As explained earlier, the Keystroke Event is also the List Change Event. Care must be taken when using this event because it’s called twice- once when the user clicks on a list entry, and once when the data is committed. It’s the second call, when the data is committed that we want to use this event. It’s at this time that the data entry is complete and selection data is valid.
Enter the following code into “Custom Keystroke” Event script
if( event.willCommit ) {
    if(event.value == "") this.resetForm(["DeptContact","DeptEmail","DeptNumber"]); else SetFieldValues(event.value);
}
9. This code controls how the form will respond to a user selection. The first line if(event.willCommit) uses the event.willCommit property to filter out Keystroke Events caused by the user’s initial click and by actual keystrokes if the Combo Box is set up to allow text entry.
The second line if(event.value == " ") directs the script to reset a group of fields if the selection is empty. This is a little form design trick. Acrobat doesn’t allow specifying an actual empty selection, so a list entry that’s a single space character is used to represent “no selection” (Figure 2). When the user selects it, the fields are cleared that would otherwise be populated with some data.
For valid selections, the SetFieldValues() function is called. This is a function that we’ll be creating in the next few steps. It is this function that performs some action on the other form fields such as hiding or showing fields or changing how a calculation will be performed. In this example, the script will be pre-populating some fields.
10. Open the Document Script Dialog (Figure 4) from:
- Acrobat 7 Pro: The “Advanced > JavaScript > Document JavaScripts…” menu item
- Acrobat 8 Pro: The “Advanced > Document Processing > Document JavaScripts…” menu item
11. Enter “SetFieldValues” as the Script Name and click on the Add… button, as shown in Figure 4.
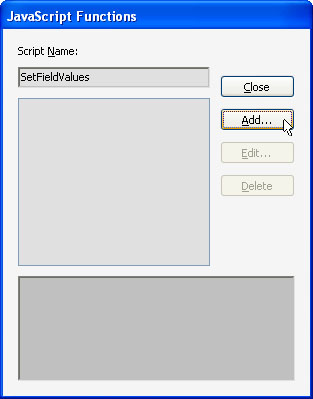
Figure 4 – Creating a Document Script
12. Enter the following code into the script editor. Note that the SetFieldValues() function definition is already in the script. By default Acrobat creates a function with the same name as the script. In the code below this function definition has been modified with the addition of an input argument named “cDeptName “.
// Place all pre-population data into a single data structure
var DeptData = { Accounting:{ contact: "Steala Damuni", email: "[email protected]", deptnum: "cmp1234" }, Engineering:{ contact: "Frank N. Stien", email: "[email protected]", deptnum: "eng1234" }, Marketing :{ contact: "Shelly Oughtbuks", email: "[email protected]", deptnum: "mkt1234" }, ITSupport:{ contact: "Goah Wei", email: "[email protected]", deptnum: "its1234" }};
function SetFieldValues(cDeptName) {
    // Populate fields with values from the Department Data Object
    this.getField("DeptContact").value = DeptData[cDeptName].contact;
    this.getField("DeptEmail").value = DeptData[cDeptName].email;
    this.getField("DeptNumber").value = DeptData[cDeptName].deptnum;
}
The first part of this code is an object literal definition, DeptData, that contains all the department data, i.e., the contact names, email, and department number for each department. The data is set up all in one object to make it easy to access in code and easy to change in the future. For exactly these reasons it is good coding practice to centralize data the script will deal with whenever possible.
The data object is organized as a two level object with the department names on the first level, and all the other info in the second level. This allows access to the department info through the department name, which is exactly what’s needed since the Combo Box returns the department name.
The SetFieldValues() function applies values from the DeptData object to the appropriate fields. The specific department data is acquired from the department data object by treating the department data object as an array, for example:
DeptData[cDeptName].email;
returns the email address for the department specified by cDeptName. This “object” array notation allows the script to randomly access the department data in a simple and consistent way.
The last step of this process is to try it out. Field pre-population has many advantages. It’s easy for users to understand, less form data for users to enter, takes less time, and reduces errors. For more information on Combo Box properties, functions, and events please see the Acrobat JavaScript Reference1.
1 Acrobat JavaScript Reference
partners.adobe.com/.../index_doc.html#js