
Creating a custom dynamic stamp
By Lori DeFurio – February 20, 2007
I’m often asked how to create a custom dynamic stamp by users who have noticed the dynamic stamp capability in Adobe Acrobat software. This tip reviews how to produce your own.
Note: Dynamic Stamps were first added in Acrobat 6. The instructions here are specifically for Acrobat 8, but most of the instructions are the same for earlier versions of Acrobat.
Note: The Text Field form tool is required, which means you must use Acrobat Professional to create a custom dynamic stamp.
Video Available
This tip is also available as a video.
Create your own dynamic stamp in Acrobat.
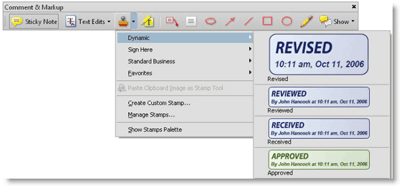
Figure 1. Using a dynamic stamp in Acrobat 8 Professional.
A dynamic stamp consists of the image of the stamp and a Text Form Field with JavaScript that creates the dynamic information (Figure 2).

Figure 2. A dynamic stamp consists of the PDF image and a Text Form field with JavaScript.
Your dynamic stamp can be stored in one of two locations for Acrobat 8 in Windows:
- [install directory]\plug_ins\Annotations\Stamps\[language] (see Figure 3)
- [user directory]\Application Data\Adobe\Acrobat\8.0\Stamps
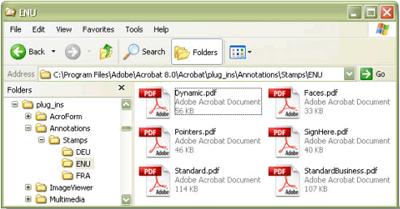
Figure 3. Location of the PDF containing the default dynamic stamps in WindowsXP
- For Acrobat 6, look in C:\Program Files\Adobe\Acrobat 6.0\Acrobat\plug_ins\Annotations\Stamps\ENU
- For Acrobat 7, look in C:\Program Files\Adobe\Acrobat 7.0\Acrobat\plug_ins\Annotations\Stamps\ENU
- On Mac OS X, search for “Acrobat User Data” and then drill down to the Stamps folder.
Steps to creating your own stamp
Step 1
Choose Comments > Comments & Markup Tools > Stamps > Create Custom Stamp.
Step 2
Select the file you want to be your custom stamp. The stamp can be in many file formats, including PDF, a graphic (*.tif, *.bmp, *.gif, *.jpg, *.png, *.pcx), a native Microsoft Office document (*.doc, *.xls, *.ppt), an AutoCAD® drawing, or an HTML page. To see all the possible formats you have available - select File > Create PDF > From File and check the Files of Type drop-down list.
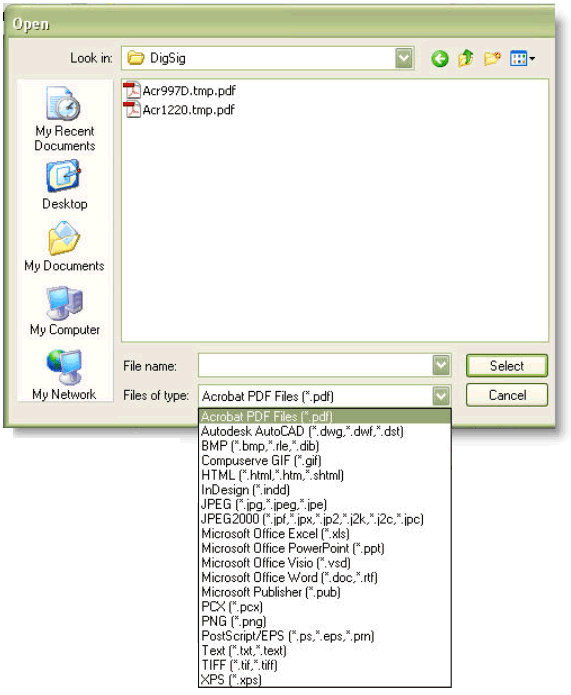
Figure 4: List of file formats that can automatically be converted to an Acrobat stamp
See larger image
Step 3
Create or choose a category and name your stamp. (See Figure 4).
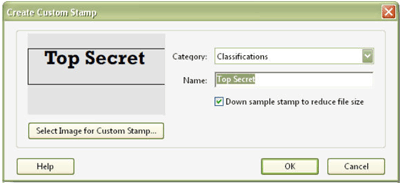
Figure 5. Custom stamp with a new category and name
When you select OK, your stamp is automatically created in the Application Data directory (c:\Documents and Settings\login name\Application Data\Adobe\Acrobat\8.0\Stamps). The actual name of the PDF stamp created will be generated by Acrobat. In this example, the file name is mkWXAu6ok-vDmYeXdpd4EB.pdf. (Note: you can rename this file if you want.) To determine which stamp is the one you just created, sort the stamps by date modified. The newest stamp is yours.
Step 4
Open Dynamic.pdf in the Acrobat 8\Acrobat\plug_ins\Annotations\Stamps\[language] folder and turn to the page containing the automatically-generated text you want, such as Revised on page 1.
Step 5
Choose the Text Field tool from Tools > Forms > Text Field tool. Select the text field on the stamp and copy it.
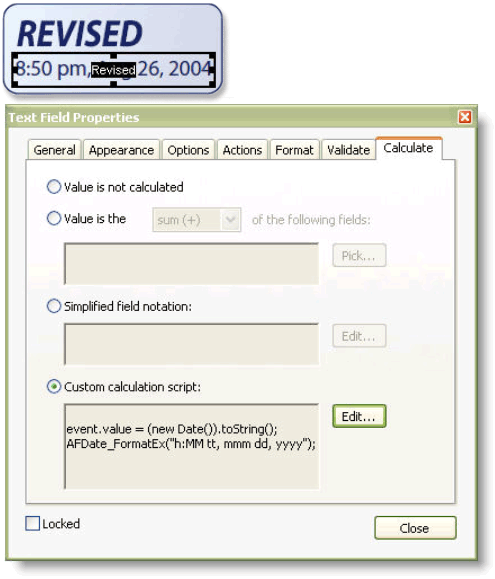
Figure 6. Form field in the default Revised dynamic stamp and its JavaScript
See larger image
Step 6
Open the PDF file containing your custom stamp and paste the text form field, which includes the JavaScript to display the dynamic information.
Step 7
Save the PDF file. You now have a dynamic custom stamp.

Figure 7. Final custom stamp