![]()
How to print a PDF with comments
By Kelly Vaughn – December 1, 2015
In my technical publishing workflow, I have done my very best to convince my clients of the beauty and efficiency of PDF commenting. And for those people who are my direct contacts, it works! They read my instructions, perhaps watch a quick tutorial video, and they are faithfully using the commenting tools to mark up the documents I send them. But then comes the inevitable question: "How do I print out the document along with the comments?" While my client and I can see the comments just fine right within Acrobat, the backstory is that someone at his or her office (the boss) wants the hard copy of the document, complete with comments. Sigh...
The default print setting for Acrobat DC is to print the Document and Markups. My document is filled with red strike outs, blue replacement text indicators and red drawing lines. So when my client goes to print the commented document, the default setting (Document and Markups) (Figure 1) enables my client to print the markup indicators but not the actual replacement text (in the pop-up notes). This article details two different ways to print a document with comments (what's in the pop-up notes) and why one of those ways is so far superior to the other.
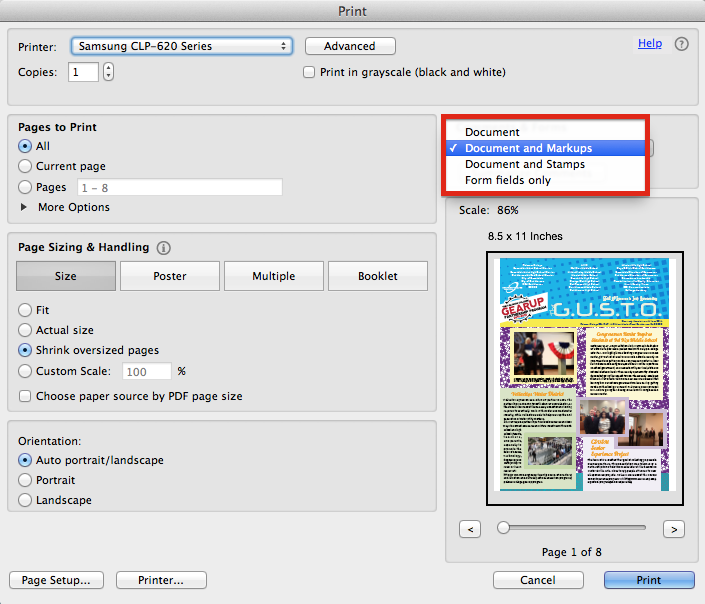
Figure 1: Default print settings.
There are actually two primary ways of printing a document with comments. Neither one of them is very obvious. The first can be found in the print dialog box.
Print with comment summary
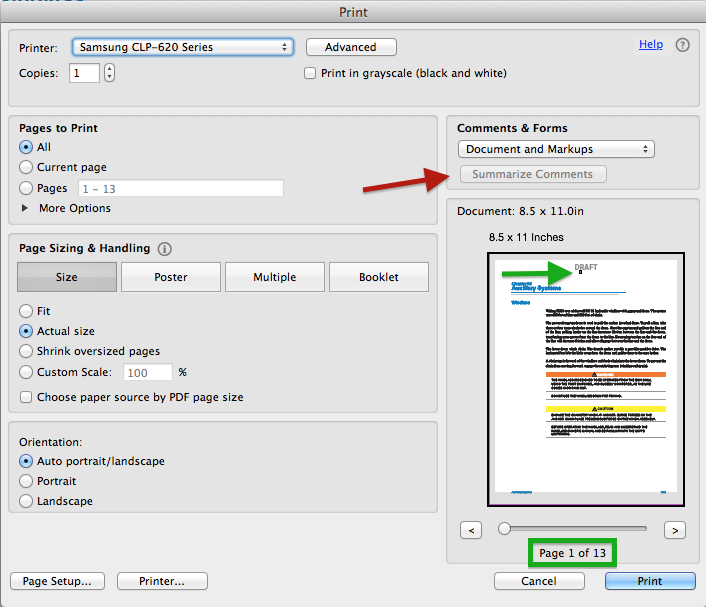
The most obvious way to accomplish this task is to print a document with comments. Go to File > Print. In the Print dialog box (Figure 2), there is a small button above the document preview: "Summarize Comments." There are a couple of things to take note of in this dialog box. Notice how there are 8 pages in this document. Now click on the Summarize Comments button.
Figure 2: Acrobat Print dialog box.
You'll get a dialog box asking if you want to include the text of the summarized comments in the document being printed. Click Yes (Figure 3). If you click No, that essentially cancels the operation and sends you back to the print dialog box. So you'll need to click Yes.
Figure 3: Are you sure?
Then, without any user input required, a new print dialog box (Figure 4) appears. At first glance, it's the same, but look closer. There are a few very small changes.
- The Summarize Comments button is now dimmed.
- There are now 13 pages instead of 8.
- There is a very tiny little rectangle at the top of the page.
Figure 4: Acrobat Summarize Comments Print dialog Box.
That rectangle is so small, it's easy to miss. Here is the same image zoomed in closer (Figure 5).
Figure 5: Teeny tiny rectangle representing a comment.
Now click Print! I was so hopeful the first time I did this. I would actually be able to see my comments on the printed page. Only they were on a different printed page, and they were ridiculously small! But at least they were printed. Maybe this would teach my clients how important it is to use PDF commenting on the actual computer! So I sent along the instructions to my client, along with an apology for the text being so small.
A week or so later, I got in return a 200 page scanned document with handwritten comments. Lucky me! That's teach me for being secretly cynical.


Create comment summary
Fast forward a few months and I discovered a little gem hidden inside the Comments Pane Option button (Figure 6). What puzzled me is that all this time I thought I had already been creating a Comment Summary. But there were these two different Comment Summary buttons sitting right next to each other. They obviously must do different things. And oh boy, was I right!
Figure 6: Create comment summary button.

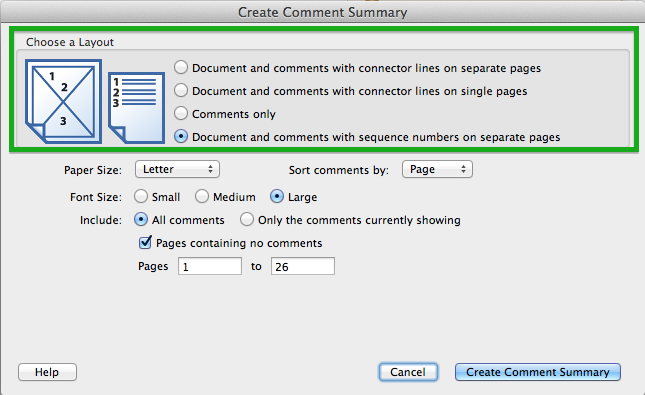
Choose a layout
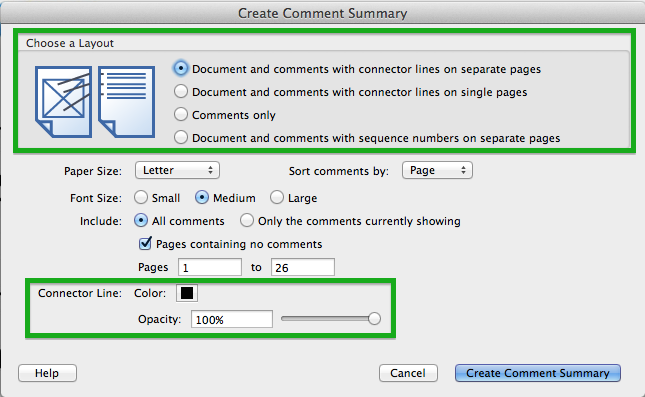
The Create Content Summary dialog box gives you a variety of options to suit your needs. You can choose between four different layouts of how you want your comments displayed. Notice how the icons to the left of the bullet points change to illustrate each layout.
The first two layouts include connector lines (Figures 7 and 8), and you can choose the connector line color and opacity.
Figure 7: Document and comments with connector lines on separate pages.
Figure 8: Document and comments with connector lines on single pages.
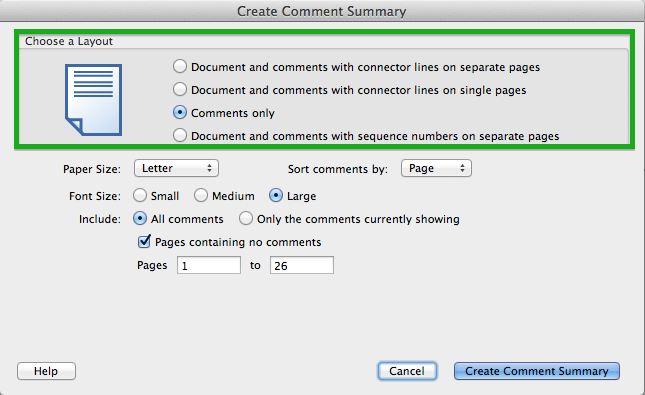
The third layout displays comments only (Figure 9) and will not include the original PDF document.
Figure 9: Comments only.
I personally find the fourth layout (Figure 10) to be the most useful. This is the most similar to the "Create Comment Summary" result from the Print dialog box.
Figure 10: Document and comments with sequence numbers on separate pages.

Choose a page size
Also included in this dialog box is your choice of page size (Figure 11). It's important to note that this list contains only standard page sizes. So if you have set up a custom page size, it will not appear in this list; likewise, if your document is a custom page size, your document will be resized to fit on one of the standard page sizes.
Figure 11: Page size.

Sort comments
Next you have an option of how you want your comments sorted (Figures 12, 13, 14, 15 and 16).
Figure 12: Sort comments by author, date, page and type.
Figure 13: Sort comments by page.
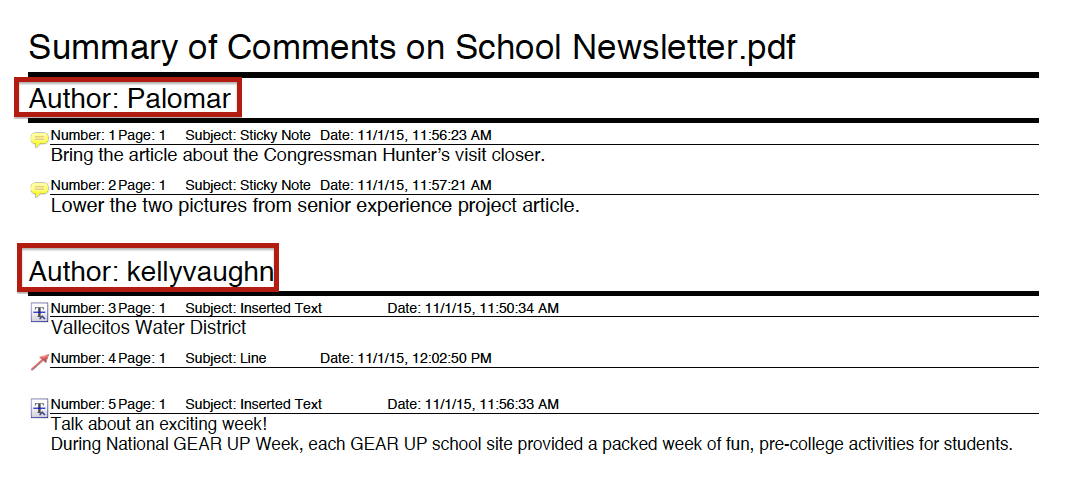
Figure 14: Sort comments by author.
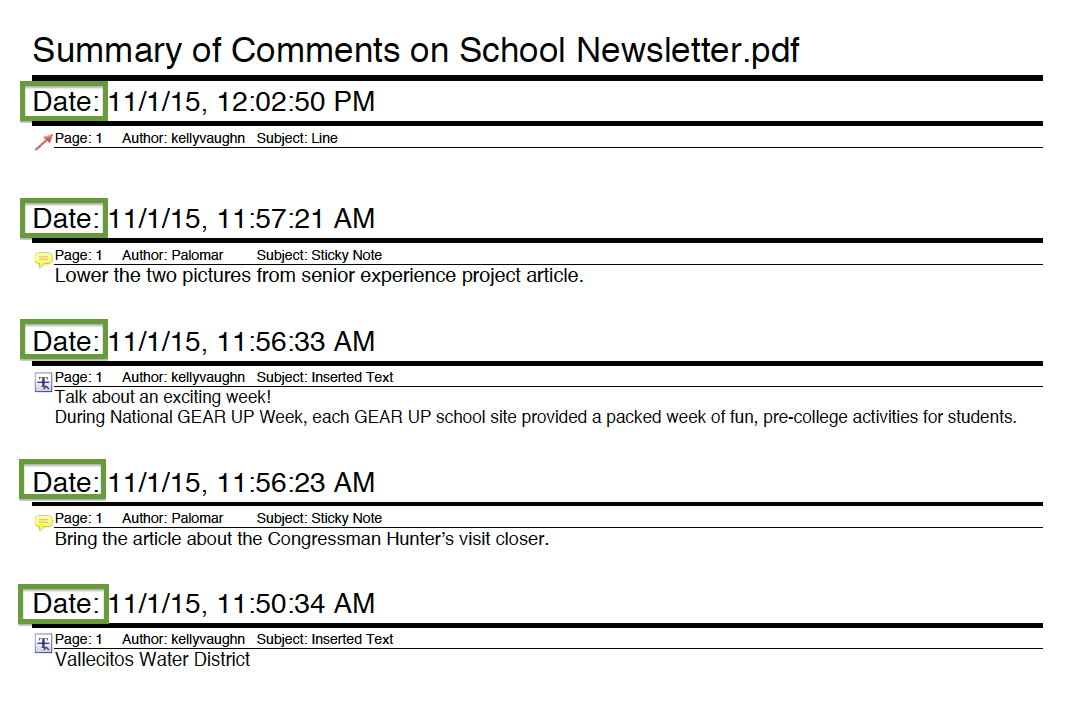
Figure 15: Sort comments by date.
Figure 16: Sort comments by type.


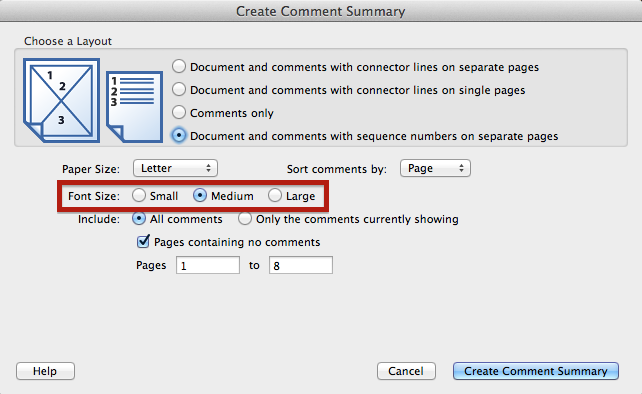
Choose your font size
Another great option in this dialog box is the option to choose your font size (Figure 17). This is important, because when printing the comment summary directly from the Print dialog box, the font size defaults to small, which is about 8 points.
Figure 17: Choose your font size for your comment summary.
Notice that the font size affects all the type on the page, not just the comments themselves. Choosing a larger font size is important if the person or persons reviewing your comments have trouble seeing small type (Figures 18, 19 and 20).
Figure 18: Small font size.
Figure 19: Medium font size.
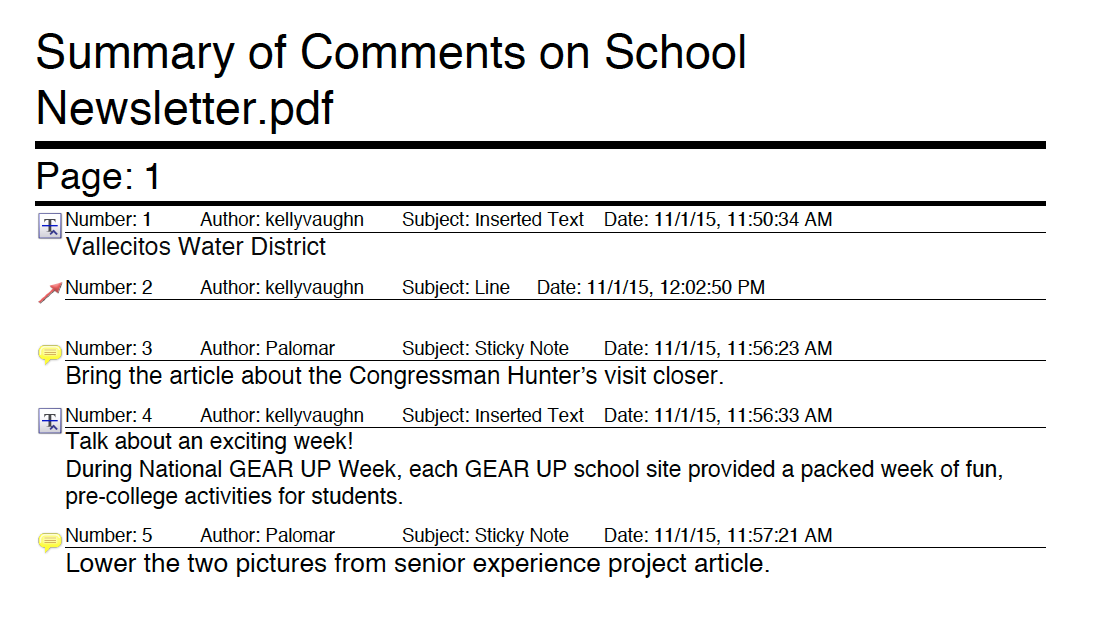
Figure 20: Large font size.
Another issue with the small font size is that the Comment Summary page has 0.5" margins, and the type fills the entire horizontal width of the rest of the page. So if you're choosing a letter sized page, that's a 7.5" line length. That line length is fine for large type, but for small type it's entirely too long and makes the paragraphs much more difficult to read. The larger the page size you choose to use, the more this problem is compounded.
Notice how difficult it is to read long paragraphs in conjunction with the long line length and small font (Figure 21). This is another great reason to choose either medium or large font size.
Figure 21: This font is too small for this long line length.
Notice the font size doesn't just affect the comments page. It also affects the font size in the tiny little rectangle associated with each comment. Using a large font size makes it much easier to locate the associate rectangles on the document page itself (Figures 22 and 23).
Figure 22: Large font size in comment rectangle indicator.
Figure 23: Small font size in comment rectangle indicator.
Also note that if you have adjusted the font size in your pop-up notes, that will also affect the font size of the comments when creating a Comment Summary. If your fonts in the comments of your Comment Summary are all different sizes, that's likely the reason.


Choose which comments to include
Let's say you have filtered your comments, and you want to create your comment summary with just the comments you've filtered. Well you can! Right within the Create Comment Summary dialog box, you can choose to include all the comments or just the ones currently showing (Figure 24). If you have multiple people who will be reviewing your document, it may be helpful to just include the comments that pertain to them.
Figure 24: Include only the comments currently showing.

Choose which pages to include
The final portion of the Create Comment Summary dialog box allows you to choose which pages to include in your summary. Here is a real world example of why this is important.
My sample document has 8 pages, but only 5 of those pages have been commented. I can choose to include just the pages with comments, or to include all the pages, even those containing no comments (Figure 25). I can even specify a page range.
Figure 25: Include pages containing no comments.
If you choose to include the pages that contain no comments, they will look like this (Image 26):
Figure 26: This page contains no comments.
Now, the next time your client or boss asks you to to print out the document with the comments, hopefully it will be a bit easier. And as you're handing him or her the printed document, don't forget to remind them how wonderful PDF commenting is. Maybe even offer to give them a tutorial so they'll stop asking you for the comments printed out. ;)