
Presenting: Adobe Presenter
By Donna Baker – June 30, 2008 Donna Baker
By now, I’m sure everyone has seen PDF presentations created from PowerPoint—with good reason. PowerPoint produces compelling, visually attractive content that is simple to convert to PDF, including features like animation and transitions. Acrobat 9 Professional (Windows) elevates the PowerPoint-to-PDF creative process to a new plane with the introduction of Adobe Presenter, a simple way to create multimedia presentations and e-learning content.
By now, I’m sure everyone has seen PDF presentations created from PowerPoint—with good reason. PowerPoint produces compelling, visually attractive content that is simple to convert to PDF, including features like animation and transitions. Acrobat 9 Professional (Windows) elevates the PowerPoint-to-PDF creative process to a new plane with the introduction of Adobe Presenter, a simple way to create multimedia presentations and e-learning content.
Note: Adobe Presenter is available for Windows, and is compatible with Microsoft Office XP, 2003 and 2007.
What is Presenter, and why do I need it?
Suppose you could use PowerPoint as the basis for creating a sequence of presentations, learning materials, surveys and even standards-compliant quizzes. Further, suppose you could attach audio narration synchronized to your presentation and other types of multimedia, such as video. Finally, suppose you could publish the whole works as a Flash SWF, export it as a multimedia PDF file to view in Acrobat or Adobe Reader, or use it online via Acrobat Connect Pro (Figure 1). Would it be worth investigating? I think so.
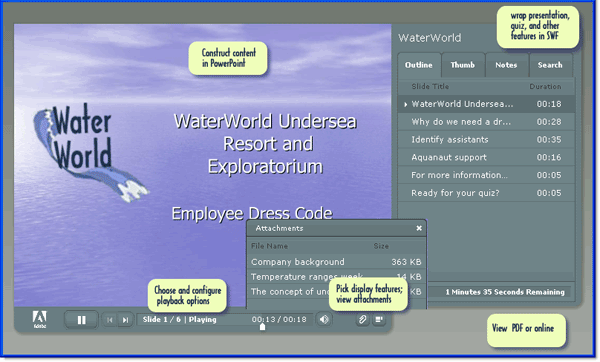
Figure 1: Use Presenter to combine many features within a SWF wrapper
Note: Check out the PDF file produced for this article’s example, which includes attachments, an embedded FLV movie and a quiz.
Download PDF file [1.32 Mb]
Adobe Presenter is too feature-rich for more than an overview in this article; you’re sure to find lots of information online in the upcoming weeks and months. To help get you up to speed, I’m focusing on a basic workflow for building, storing and delivering a presentation. I’ll also point out a variety of features you can access for specialized functions and further exploration.
Presenter is integrated as a menu in PowerPoint as part of the Acrobat 9 Professional installation process. Like PDFMaker in PowerPoint, Presenter displays its own menu. Unlike a PDFMaker, however, Presenter doesn’t include a toolbar, and its menu is extensive (Figure 2). Interestingly, the learning curve for Presenter isn’t especially steep, primarily as it is introduced within the context of PowerPoint.
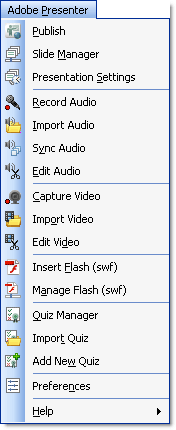
Figure 2: Presenter offers an extensive menu of options
Tip: Use the Office features to create a custom toolbar for Presenter. When you pull commands from the Presenter menu for your custom toolbar, the items appear to be removed from the menu. Not to worry—close and reopen PowerPoint to restore the menu.
Basic Presenter workflow
Like any project, planning is key. Once you have defined how you intend to use the presentation, assemble materials and plan the content.
1. Create the presentation
Whether you start from an existing PowerPoint presentation or design from scratch, use the Presenter features to produce high-impact content. With the exception of quiz slides, Presenter content is added to existing slides. Quiz and scoring slides are added for you, using your Master slide layouts (Figure 3). You don’t configure the basic slide content and appearance, such as the background, color scheme, text and images using Presenter.
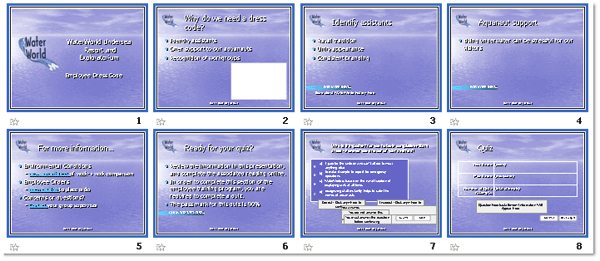
Figure 3: Presenter content added to PowerPoint slides
2. Add Presenter features to the slides
Choose items from the Adobe Presenter menu to enhance the presentation. For example, choose Adobe Presenter > Insert Video to open a dialog where you locate and select a video that is inserted on the slide and converted to Flash video (FLV) format.
Depending on your needs and presentation design, you can record audio or video using commands on the Adobe Presenter menu. To insert audio, for example, choose Adobe Presenter > Record Audio to open the dialog shown in Figure 4. You can record audio for any or all slides from this simple controller.
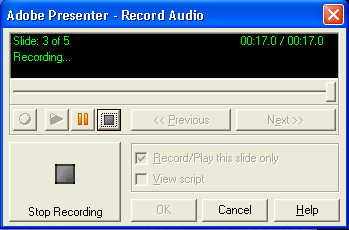
Figure 4: Record audio for one or all slides in your presentation
Quizzes are surprisingly easy to configure in Presenter. Not only can you build a quiz from scratch, you can also import existing quiz materials, and configure the quiz to your requirements. Follow these steps:
- Choose Adobe Presenter > Quiz Manager to open a dialog that lets you specify features for the overall quiz, such as reporting mechanisms, appearance, buttons, text and so on.
- Click Add Question to open the Question Types dialog and select a type, ranging from Multiple Choice to Likert. Click OK to open a New [type] question dialog, shown at the upper left of Figure 5. Add the question, responses, scoring and so on. Click OK to add the question to the quiz.
- Continue adding questions as required, and click OK to close the Quiz Manager. On the slide, you’ll see the question, responses, buttons and popups stacked on the slide (right center of Figure 5). When testing the file, however, the quiz displays appropriately (lower left image in Figure 5).
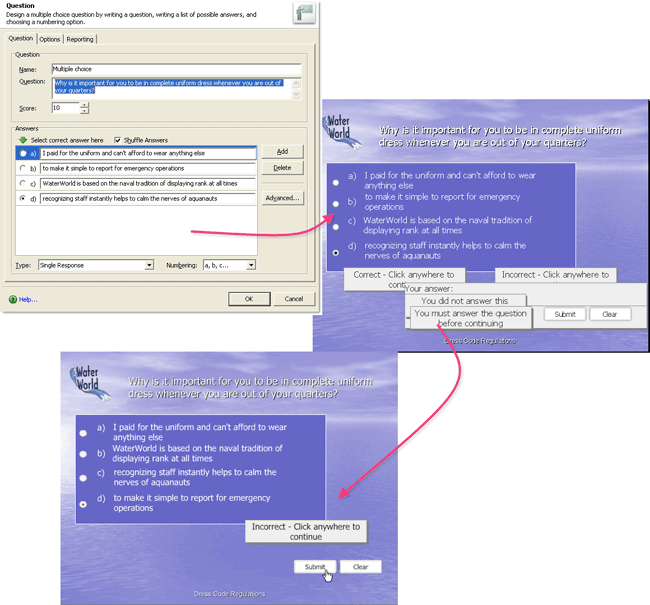
Figure 5: Configure and insert quiz questions into a presentation
3. Configure the interface
In addition to content added to the slides, Presenter offers configuration and control features for the SWF interface. The design of the interface is based on themes, which allow you to customize features such as presenter information, color schemes, panes, sidebar and so on. Choose Adobe Presenter > Presentation Settings to open a four-tab dialog (Figure 6).
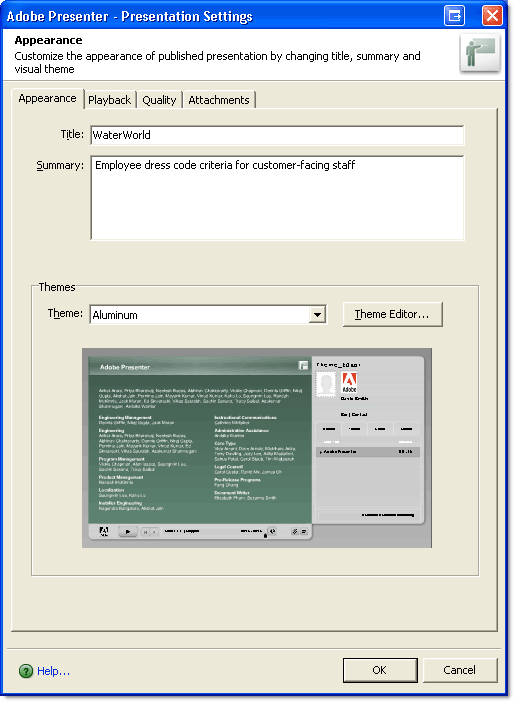
Figure 6: Specify characteristics for the presentation appearance and playback
Appearance. On the Appearance tab, add a title and summary information for the presentation. Your summary isn’t shown in the presentation, but displays with other identifying information when published to Acrobat Connect Pro. Choose a Theme from the Theme dropdown list to specify a color scheme, text and so on for the interface. Click Theme Editor to open a dialog where you can choose the sidebar location, panes, font, labels and other interface details.
Tip: Once you’ve customized a theme, save it for future use.
Playback. On the Playback tab, choose options such as auto play, pauses, looping and so on.
Quality. On the Quality tab, specify whether you want to use settings for computer playback, PDF, or Adobe Connect Pro. Also on this tab, choose audio and image qualities, and select Enable Preloading to download slides and/or embedded FLV content prior to playback.
Attachments. On the Attachments tab, locate and include files you want to include with the presentation, such as additional information (Figure 7). An attachment can be bundled with the presentation, or included as a link.
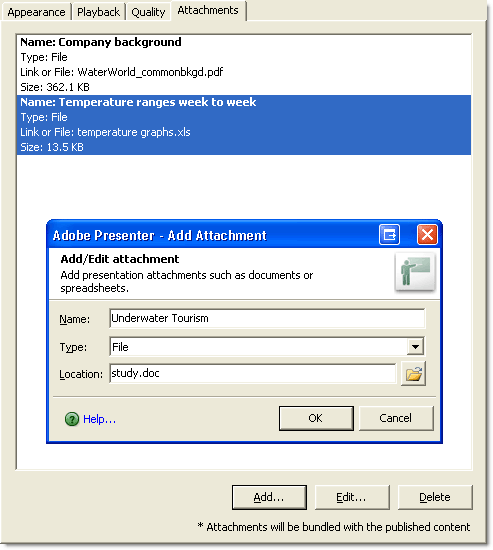
Figure 7: Attach or link content to the presentation
When your theme is complete, click OK to close the Presentation Settings dialog. Use the usual methods of testing and viewing slides in PowerPoint. When you’ve finished building and tweaking the content, the final stage is testing and publishing.
4. Publish the presentation
It isn’t necessary to use Adobe Connect Pro to run a presentation: Presenter offers exports in several formats.
Choose Adobe Presenter > Publish to open the dialog and choose an output option (Figure 8). The locations and options vary according to your output destination:
Choose My Computer to publish the presentation to your computer as SWF. Specify a folder location and whether to build a Zip or CD package. Publishing a SWF produces both a full-size presentation, as well as a Flash-lite presentation suitable for mobile devices.
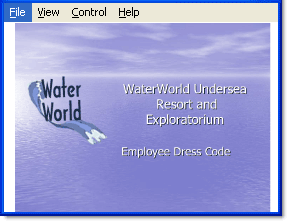
Figure 8: Produce a SWF for mobile devices automatically
Choose Adobe Connect Pro to publish the presentation online. Specify the server, and whether to upload assets (audio, video and attachments) along with the presentation product.
Choose Adobe PDF to export as a SWF—including animations defined in PowerPoint—embedded in a PDF file. Select the storage location.
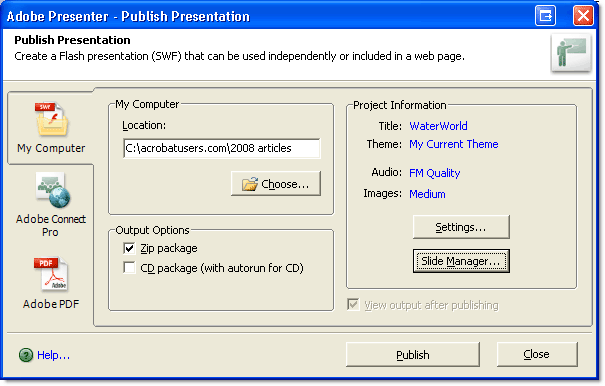
Figure 9: Specify published product types and features
Regardless of the option you choose, all publishing destinations display Project Information and let you configure settings and manage the slides. Once you have made your choices, click Publish to process the file and create the presentation.
I’ve given you a brief look at Presenter: Is it enough for you to do some investigating on your own? Can you see how it could enhance your work? I’d like to hear from you.