This tutorial shows you how to work with the Combine Files features in Acrobat 9. See what the all-new Acrobat DC can do for you.
Download a free trial of the new Acrobat.
The ABCs of Acrobat 3D
Learn how to use Acrobat 9 Pro Extended (Windows-only) to include 3D content in your PDF files.


Imagine using 3D imagery to show your class the inner structures of a leaf, or adding 3D models of your latest products to your PDF catalog (Figure 1). It's easy with Acrobat 9 Pro Extended and a little know-how. In this article, I'll show you how to include 3D content in your PDF files and choose settings that provide the best experience for your users.
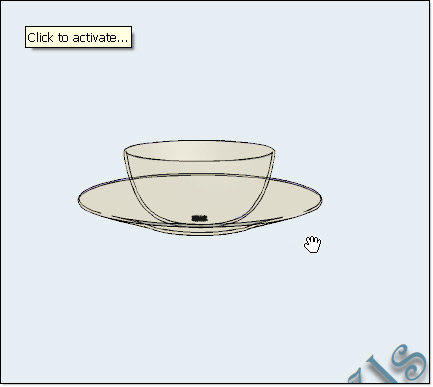
Figure 1: Enhance your user's experience with 3D content.
Creating 3D content
You can use a 3D model in Acrobat like other source files. Produce a 3D PDF file using any of these methods:
- Create a 3D model on a single page, just as you would any other type of PDF document.
- Include 3D models in a multi-page PDF file, along with other file types, with the Merge Files into a Single PDF command (on the Create task button's drop-down menu).
- Insert a 3D model as a new page in an existing PDF document.
In all cases, selecting the 3D model activates the Add 3D Data dialog box, where you specify display features, lighting, navigation and other settings.
Acrobat 3D conversion settings
There are dozens of individual settings for you to select in the Conversion dialog box, as well as a number of presets (Figure 2).
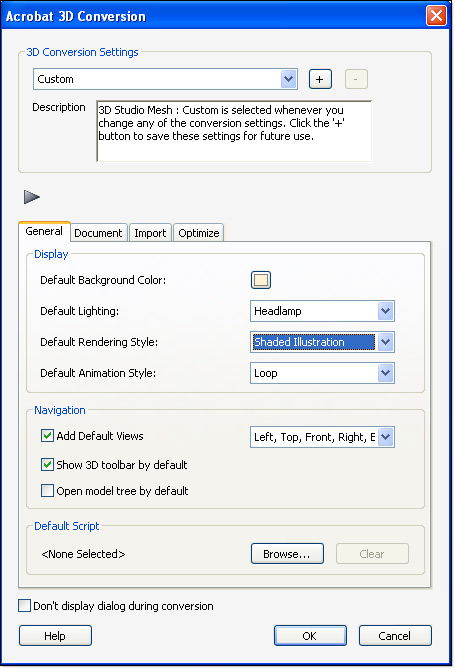
Figure 2: Configure the model and its appearance.
To pick a preset, click the drop-down arrow at the top of the dialog box to open a list. Acrobat provides a range of options focusing on quality or file size in different ways, including these three examples:
- The Default preset balances the PDF file size against the quality of the model.
- Use the Visualization/Small File preset when you want the maximum compression, although the model's quality suffers. You might use this version for customer downloads of your product catalog.
- Use the Visualization/High Quality preset for high levels of detail in the PDF file (along with a larger file size), to show models to clients or customers for approval.
As soon as you modify a setting, you'll see the preset label change to Custom. Although an in-depth discussion is beyond the scope of this article, here are some general tips to keep in mind and some settings you might want to change. In all cases, changing settings affects how you see the model, not the imported model itself.
General tab
You can specify the appearance of your model using settings in the General tab (shown in Figure 2), or modify them after importing using the 3D toolbar. If you plan to attach security, check the appearance of your model before adding a password or other security.
Common modifications you'll make to a model include setting a default background color and lighting. It's best to have visual contrast between your model's color and the background, so don't leave a mid-gray background behind a model of a gray leather case.
If your users are likely to manipulate your model a fair bit, select the Headlamp option for the best light distribution. Pick a rendering default as well—you want the model to look attractive, or at least descriptive, when your user first opens the file.
The model rendering modes include combinations of factors that affect the appearance of the 3D object. The illustration in Figure 3 shows a simple object rendered in three available modes.
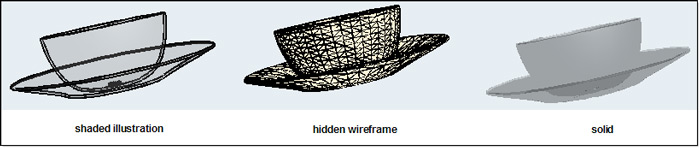
Figure 3: Choose a rendering style that displays on the page.
You'll see defaults chosen for the views, running animations (if you're including scripts), showing the 3D toolbar, and viewing the Model Tree panel.
Document tab
Use features on the Document tab to define the page layout, permissions and encryption. For repeating content, such as catalog pages, consider using a template for ease of layout. For one-off PDF pages, click Page Setup to choose settings for margins, page size and orientation.
If you intend to password-protect the file, and are confident of the appearance settings you choose for the incoming model, choose security settings before creating the model to save time.
Import tab
Choose options for importing with your model, if they exist. Some file types, such as 3D Studio files, don't have any configurable import choices. Instead, the tab's options are grayed out, but you'll see what's being imported.
Optimize tab
Choose between U3D and PRC conversion formats on this tab. The file format of your 3D model determines the available settings.
For PRC files, you'll have an array of choices dealing with polygon compression and level of detail. For U3D files, check out the Mesh Quality setting, where you can balance the image quality against the compression more precisely than choosing a default conversion preset. To make the model easier for the layperson to view and understand, use the Center Model At Origin setting, which moves the X-Y-Z coordinates to an origin located at the center of the bounding box (Figure 4).
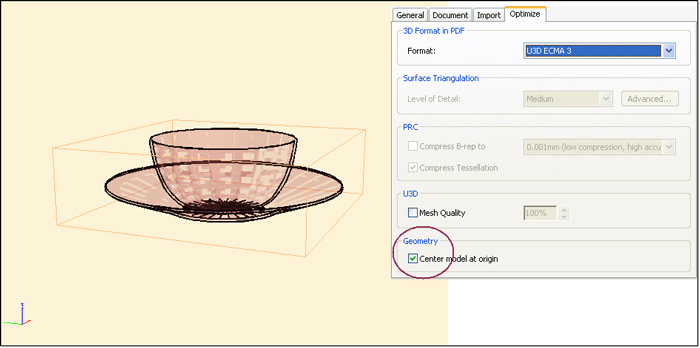
Figure 4: Optimize the file and center its geometry.
Adding 3D models to a PDF page
Rather than building a complete page for a model, it's easy to specify a page location, or canvas, on an existing document using the 3D tool. The options available for configuring the model and the page aren't as extensive as those described earlier, since you're already working with an existing PDF file.
Follow these steps to insert a model on an existing PDF page:
- Click the Multimedia task button and choose 3D Tool from the drop-down list (Figure 5). Draw a marquee on the page and release the mouse to open the Insert 3D dialog box.
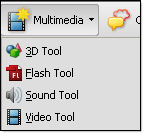
Figure 5: Choose the Insert 3D tool.
- Click Browse to open a dialog box to locate and select the 3D file.
- Click Show Advanced Options to display three tabs of settings. Modify options such as the border width, the background color, and the poster image shown on the page when the model is inactive on the Launch Settings panel (Figure 6).
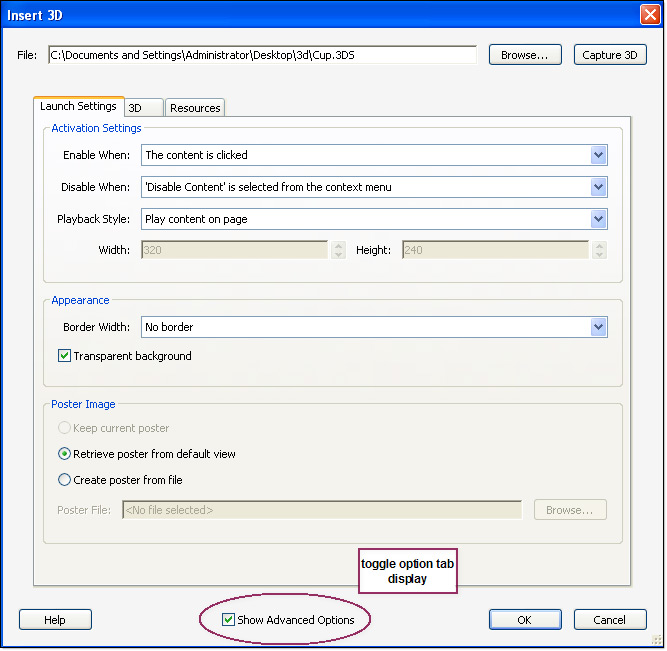
Figure 6: Specify appearance options such as a border or poster.
- Click the 3D tab to display settings for the model itself. Here you can pick items like the type of light used, background color, the views and so on. Use features on the Resources tab for attaching scripts to the model.
- Click OK to close the dialog box and show the Insert 3D dialog box. Depending on the model type you're using, you may or may not be able to configure settings. In the example project, the 3DS (3D Studio) file doesn't allow for configurations, and items are preselected.
- Your model displays on the page in the canvas. Adjust the size or location of the canvas as desired.
Tip: If you want to modify the 3D settings, click the canvas with the Select Object tool, then right-click to open the shortcut menu and choose Properties.
Interacting with the model
Whether inserted on a page or as a separate PDF file, a 3D model displays the 3D toolbar when you click its canvas (unless you deselected the option to show the toolbar when configuring the file).
Many commands on the 3D toolbar are intuitive, such as rotating, zooming or manipulating the model in 3D space. Click a button with a drop-down arrow to show a list of options (Figure 7). As you see in the figure, you can choose from numerous rendering modes. Likewise, click the Light drop-down arrow to pick another lighting mode, the color swatch to change the background color, or the Cross Section to show a segment of the model.

Figure 7: Manipulate the model on the page.
Design a PDF template
Suppose your company sells wood moldings and furniture parts, and you're planning to include 3D models of some products. Save time and add consistency to your output with a PDF template.
Use a file from any Microsoft Office application containing a PDFMaker as the PDF template. To create the template, follow these steps:
- In Office 2003, click the Insert Acrobat 3D Model button on the PDF toolbar (in Office 2007, click Embed 3D on the Acrobat ribbon) to open the Add 3D Data dialog box.
- Click OK to close the dialog box again without selecting a model. You'll see a placeholder added to the page. (Of course, if you want to drop a model on to the page, you'd choose the model and settings in the dialog box).
- Adjust the size and location of the placeholder according to your planned pages and then save the document (Figure 8).
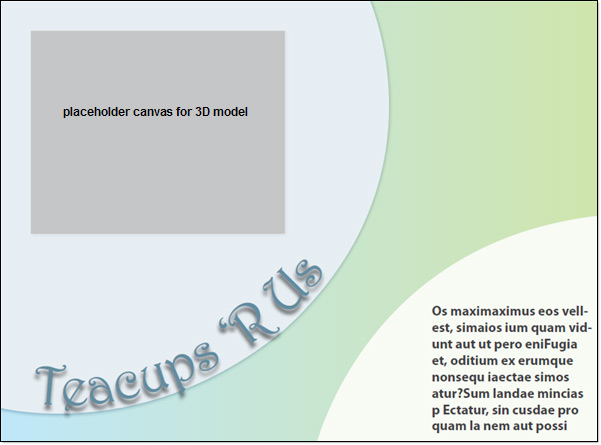
Figure 8: Configure a reusable template file.
- Click Convert to Adobe PDF on the PDF toolbar (Office 2003), or Create PDF on the Acrobat ribbon (Office 2007) and save the file as PDF.
Products covered: |
Acrobat 9 |
Related topics: |
Combine Files |
Top Searches: |
Create PDF combine files into one PDF Rearrange PDF pages |
Try Acrobat DC
Get started >
Learn how to
edit PDF.
Ask the Community
Post, discuss and be part of the Acrobat community.
Join now >
0 comments
Comments for this tutorial are now closed.
Comments for this tutorial are now closed.