This tutorial shows you how to work with the Print Production features in Acrobat 9. See what the all-new Acrobat DC can do for you.
Download a free trial of the new Acrobat.
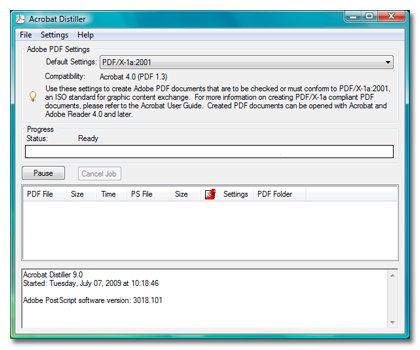
Acrobat Distiller 9
Learn how to make your own press-ready PDF setting using Adobe Acrobat Distiller 9.
By PrepressX.com – September 21, 2009

We are going to show you how to make your own press-ready PDF setting using the Edit Adobe PDF Settings… function in Adobe Acrobat Distiller 9. You will be able to select this setting each time you distill a PostScript file. To make the process of distilling your PostScript files fast and consistent, complete the following simple one-time steps to create your own Press-Ready PDF settings.
Create a New Adobe PDF Setting Based on PDF/X-1a:2001
To define a new Press-Ready PDF setting, open Acrobat Distiller 9, and set the Default Settings: pop-up menu to PDF/X-1a:2001. By selecting the PDF/X-1a setting first, many of the fields for your custom Press-Ready PDF setting will be already filled out.
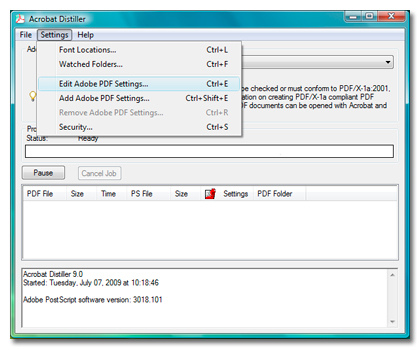
Settings
Under the Settings menu select Edit Adobe PDF Settings.
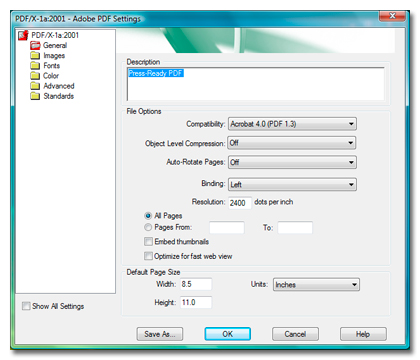
General
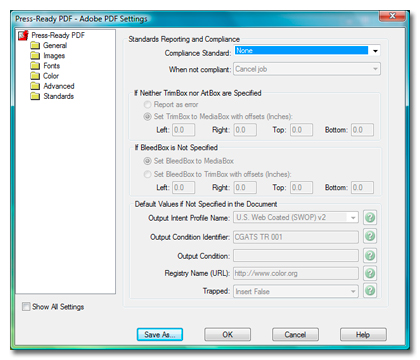
The Adobe PDF Settings dialog box will display, in the General section. In the Description field type Press-Ready PDF (or any description you like). The default PDF/X-1a:2001 values will be selected in the remaining fields. If not, make sure that your screen has the same values as the screen grab below.
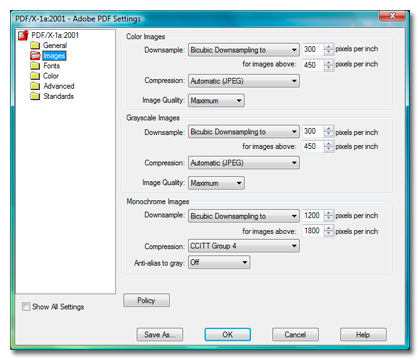
Images
Select Images from the left tree menu. You can use the default PDF/X-1a:2001 values that are selected. If not, make sure that your screen has the same values as the screen grab below.
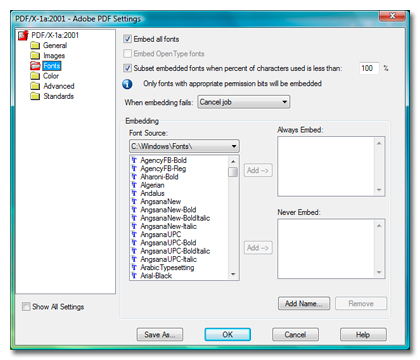
Fonts
Select Fonts from the left tree menu. Once again, we will use the default PDF/X-1a:2001 values that are selected.
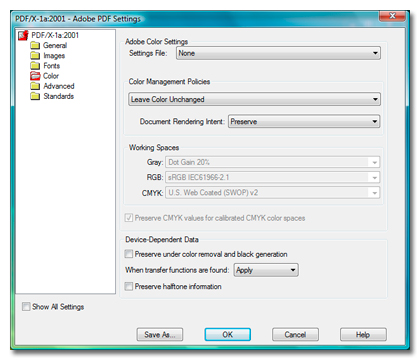
Color
Select Color from the left tree menu. In the Adobe Color Settings section, change the Color Management Policies to Leave Color Unchanged. The remaining settings should be deselected or grayed out.
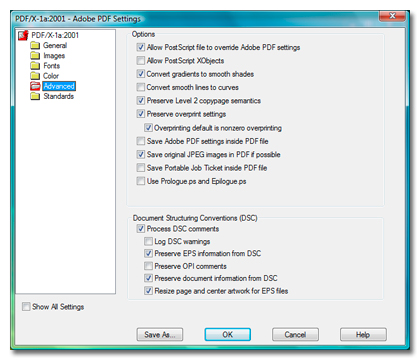
Advanced
Select Advanced from the left tree menu. We will, once again, use the default PDF/X-1a:2001 values for this section.
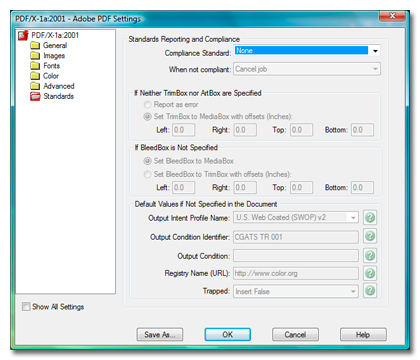
Standards
Select Standards from the left tree menu. In the Standards Reporting and Compliance section, change the Compliance Standard: pop-up menu to None. The remaining settings should be grayed out.
Click on the Save As… button at the bottom left of the dialog box.
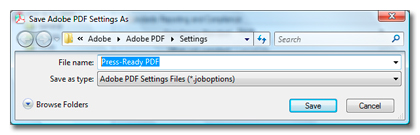
Save As
You will see a Save Adobe PDF Settings As dialog box. In the File name: field type Press-Ready PDF, or any name you like (keeping the .joboptions extension), and click SAVE to finish.
Finishing Up
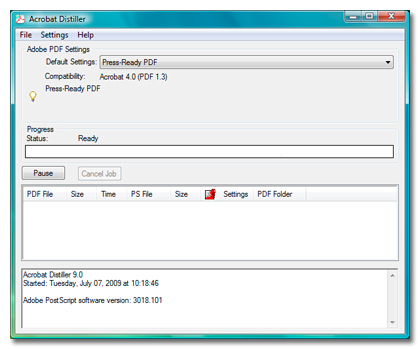
You will be returned to the Standards section. Now click the OK button.
New Default Settings
You will be returned to the Acrobat Distiller panel, with your own Press-Ready PDF settings selected in the Default Settings: field. You can now use this custom setting any time you want to convert you PostScript files into press-ready PDF files.
Products covered: |
Acrobat 9 |
Related topics: |
Print Production |
Top Searches: |
Create PDF print production tools overview |
Try Acrobat DC
Get started >
Learn how to
edit PDF.
Ask the Community
Post, discuss and be part of the Acrobat community.
Join now >
4 comments
Comments for this tutorial are now closed.
Jose Gomez
12, 2014-06-16 16, 2014Thank you all for your help.
Lori Kassuba
6, 2014-06-12 12, 2014Hi Jose Gomez,
Distiller is part of the Pro. version of Acrobat.
Thanks,
Lori
Jose Gomez
12, 2014-06-10 10, 2014Where can I get this product? I need it for windows 7
Lori Kassuba
4, 2013-10-21 21, 2013Hi frederick,
You can do this very easily using Watched Folders. Just click on the Settings menu in Distiller, select your folder and add the settings or .joboptions file.
Thanks,
Lori
frederick
1, 2013-10-18 18, 2013how can I run the distiller using *.bat and let the distiller run with predefined *.joboptions? Thanks a lot!
satish
11, 2012-11-02 02, 2012thanks for publishing this article.
Comments for this tutorial are now closed.