The art of Acrobat image handling using Acrobat 8
Learn how to extract some or all of the images in a PDF, or convert PDF to JPG or other format images.


The typical PDF file is made up of text and images. Everyone knows that. But did you know Acrobat allows you to extract some or all of the images in a document, or convert the PDF document to a series of JPG or other format images?
Your options include:
-
Using the Select tool to select an image for use in another document, page or save to an external file
-
Using the Export All Images command to create discrete copies of the images in the document for use elsewhere
-
Using the Save As command to save a PDF document in an image format
- Using the Snapshot tool to capture any content on the page and re-use it
Copy and paste individual images
Suppose you have a PDF file for a project and need an image from it for another use, but don't have the source images. Acrobat to the rescue! For simple copy-and-paste action, use the Select tool.
Choose the Select tool on the Select & Zoom toolbar, and click the image you want to reuse. Choose a command from the shortcut menu, as shown in Figure 1. You can paste the copied image into another PDF file or into any open file in another application.
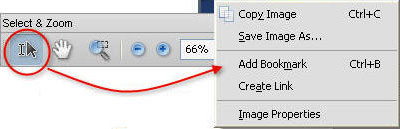
Figure 1: Select one of several basic commands
The Select tool is handy for saving individual images from a document. Right-click/Control-click an image with the Select tool to display the shortcut menu and choose Save Image. In the resulting Save Image As dialog box, name the file, choose the storage location, and then choose from one of several image formats.
Tip: What if you need just a portion of an image, such as a logo, without the attendant address and other text in the image? With the Select tool, drag a marquee around the piece of the image you want to select, copy it and use it as necessary.
Save all images
It happens: You assemble a few images into a slideshow and then delete the original images from your hard drive or memory card. If you have a PDF slideshow, you can export all the images in the file, specify the format and even define a threshold.
Follow these steps to save the images from a PDF file:
1. Choose Advanced > Document Settings > Export All Images to open the Export All Images As dialog box.
2. Choose a name and storage location for the files, which use the source file's name and location by default.
3. Select an image format from the Save as type drop-down list. The available formats are JPEG, TIFF, PNG and JPEG2000.
4. Click Settings to open a dialog box listing options specific to the image format selected (Figure 2).
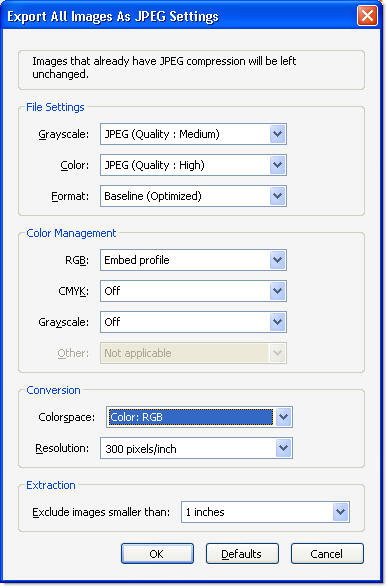
Figure 2: Configure settings for export
5. Modify the file, color management and conversion settings as required, and click OK to close the dialog box, returning you to the Export All Images As dialog box.
6. Click Save to export and save the images using the settings specified. The exported images are numbered sequentially (Figure 3).
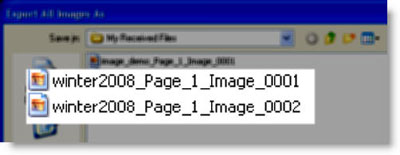
Figure 3: Exported images are numbered sequentially
If your document contains a number of small elements, such as a logo or horizontal/vertical separators, be sure to specify a threshold for conversion in the Settings dialog box. Any images having a dimension below the size specified as the threshold aren't converted and exported. Otherwise, you'll end up with one image for each instance of the object, somewhat of a nuisance if your company logo is at the bottom of every page of your 300-page report!
Make your document an image
Suppose you have made a PDF presentation from a number of images and other elements, and decide the layouts are perfect to use as the basis for some new Web pages. One way to take advantage of the interaction among Adobe CS3 programs is to export the PDF pages as individual images, which can then be used in a program such as Fireworks to serve as a Web page mockup (Figure 4).
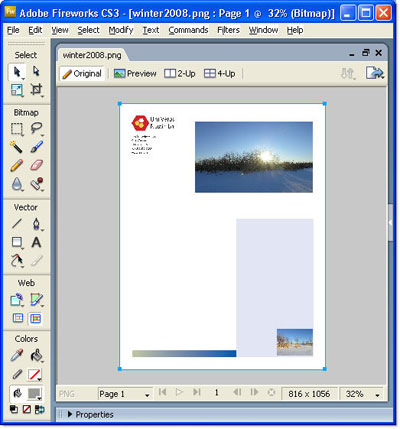
Figure 4: Export a document as images to use in other programs
Choose File > Save As and select an image file format or choose File > Export > Image and select an image format. Either command path displays the same dialog box for saving the file. As in the previous section, click Settings to open a dialog box for setting the image characteristics applicable to the chosen image format.
Create new content from a snapshot
Try the Snapshot tool to capture some of the content on a page that you can reuse as a separate PDF file or include in an existing file.
The Snapshot tool is part of the Select & Zoom toolbar, although it isn't shown by default. To display the tool, choose Tools > Customize Toolbars to open the More Tools dialog box. Scroll down the dialog box, select the Snapshot Tool and click OK; the dialog box closes and the tool is ready to use.
If you work with snapshots on a regular basis and use them for the same sort of output--such as online use--save yourself some time by setting a preference. Choose Edit > Preferences or Acrobat > Preferences to open the Preferences dialog box, displaying the General preferences. Select the Use Fixed Resolution For Snapshot Tool Images option and specify the resolution in pixels (Figure 5).
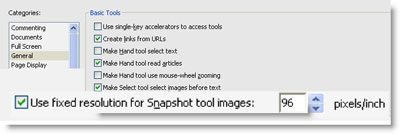
Figure 5: Define a resolution for ongoing captures
Capture content from a page
Follow these steps to capture content using the Snapshot tool:
1. Set the magnification and placement for the document. You can minimize distortion by using the magnification at 100 percent.
2. Select the Snapshot tool and drag a marquee on the page around the content you want to capture (Figure 6). When you release the mouse, the color within the marquee area is inverted to identify the area of the snapshot.
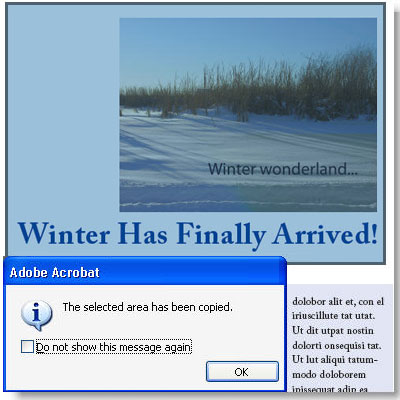
Figure 6: Drag a marquee to identify the snapshot area
3. A message dialog states the content has been copied to the clipboard; click OK to close the message dialog.
4. To create a PDF document from the content on the clipboard, click the Create PDF task button and choose From Clipboard Image. Acrobat automatically converts the clipboard image to a new PDF document.
Tip: If there is no copied content, the From Clipboard Image option is inactive.
How to use a snapshot
A utilitarian and very cool feature
Suppose you want to print part of the content on a page, perhaps one column--such as the content above a heading part way down a page or your sales regions--without disclosing your sales figures. Turn to the Snapshot tool for a quick solution. Use the Snapshot tool to drag a marquee around the area you want to print from the page. Choose File > Print to print the content stored on the clipboard.
You can use snapshots in a variety of ways, ranging from decorative to utilitarian. For example:
-
Capture specific elements of an image (such as a map) to use as linked close-ups. Zoom into the image and capture close-ups using the Snapshot tool; either create linked PDF files for the close-ups, or insert the snapshot content as an image for a button.
-
Capture some content from a page to use for iterations of the same material. For example, you might want to include lists of your retail locations for a tradeshow presentation, locations and monthly sales for a report, and sales breakdowns for another report. Instead of rebuilding the spreadsheets or tables for each presentation, use the Snapshot tool and capture just the content you want from the original for each application.
-
Capture content from different documents to serve as button images in a navigation scheme. If you have a number of visually interesting documents, such as those describing art or furniture pieces, capture the major content from the first page. Use a separate PDF file as an interface, and add captured snapshots as links or buttons to their respective documents.
I'd like your feedback:
Remember the scenario I described at the beginning of this article? As you have learned, many different types of image modifications and manipulations are possible using Acrobat tools and features. I'd like to hear your experiences.
E-mail me!
Try Acrobat DC
Get started >
Learn how to
edit PDF.
Ask the Community
Post, discuss and be part of the Acrobat community.
Join now >
0 comments
Comments for this tutorial are now closed.
Comments for this tutorial are now closed.