Automating PDF document metadata insertion with Acrobat JavaScript
Document metadata is important for holding standard document information, categorizing PDFs, and making them searchable.
By Thom Parker – August 7, 2006


Level: Intermediate
Scope: Acrobat 7 and Later
Prerequisites: Familiarity with Acrobat and Acrobat JavaScript
Document Metadata is important for holding standard document information, categorizing PDFs, and making them searchable. Metadata is particularly important, if not critical, in systems that handle a large number of documents. For example, search engines like Google use PDF metadata for searching documents and displaying the results. Opening and searching the entire contents of a file is prohibitively time consuming, whereas the metadata contains key information about the file and can be accessed quickly.
Metadata information includes the document title, author, keywords, a copyright notice, and any other information the document authors feel is important. Unfortunately, applying metadata manually is time consuming, tedious and error prone. As a result, metadata is often either missing or inadequate on working PDF documents. But, it doesn’t have to be this way.
Acrobat JavaScript provides a simple and flexible way to automate this task, turning it into an easy one click operation when used from a toolbar button or menu item, or updating whole directories of files when used in a batch process. Metadata can even be added or updated through a server based workflow by using Acrobat JavaScript and FDF.
Accessing the PDF Metadata from JavaScript
The Acrobat JavaScript DOM (Document Object Model) provides a single, easy to use Document Object property for accessing the PDF metadata, the info property. With this property we can get and set any metadata value, as well as create new metadata entries. Some examples are shown below.
// Acquire the document title
var strTitle = this.info.title;

// Set the document author to the current users name
this.info.author = identity.name;

// Add a copyright notice. This is a custom metadata entry
this.info.copyright = "Copyright\xA9 " + this.modDate.getFullYear( );
Code that manipulates the metadata can be executed from any Acrobat JavaScript context (script location), which means we are not restricted in where the metadata is updated from, at least on the metadata side of the code. There are two standard restrictions to using any Acrobat scripting, Adobe Reader operation and privileged context (i.e., security issues).
First, changes made in Adobe Reader can only be saved if the PDF has Save rights, so using Reader to make changes is usually not an option. Second, some of the functions and properties used to acquire the values applied to metadata can only be used from a privileged context. For example, the second line of code above uses the Identity object to set the author’s name. Using the Identity object generalizes the code by making it work for all document producers, as opposed to a hard coded author name that only works for a single document producer. The downside of this method is that the Identity object is a privileged property. It can only be used from a script in a batch process or a trusted function. It cannot be used from a script in a document. This is a good thing. You wouldn’t want a script in a document you’ve just downloaded to collect privileged information off your system without your knowledge. The privileged context restrictions make sure that doesn’t happen.
Automating the application of metadata is typically an application level activity performed by primary document developers who have Acrobat Professional. As such, neither of the above restrictions usually applies to this task. However, these restrictions have to be kept in mind for those situations where they do apply, such as #3 in the following list.
There are three standard methodologies for automating Acrobat.
- Create a menu item or toolbar button to activate the automation script on a per document basis.
- Place the automation script into a Batch Sequence for processing several PDFs at a time.
- Place the document changes into an FDF file. The advantage with FDF files is they are easy to transport (emailed or downloaded over the internet). The recipient of the FDF then simply loads it into Acrobat to make changes to the current document.
Automating with a Toolbar Button or Menu Item
Toolbar buttons and Menu Items are both created with Folder Level scripts, also called Application Level since these are scripts associated with the Acrobat application rather than a PDF document. These scripts are located in JavaScript files (“.js” extension) in a special Acrobat folder. Acrobat loads and runs these Folder Level scripts on startup. The actual location of the Acrobat JavaScript folders can be found by running the following code in the JavaScript Console.
// Global JavaScript Folder
app.getPath("app","javascript");

// For Current User Only
app.getPath("user", "javascript");
The results for a Windows system are shown in Figure 1 below. Macintosh systems will display a slightly different file path format.

Figure 1 – Finding the Acrobat JavaScript Folders with the JavaScript Console
See larger image
To create a toolbar button for setting the document metadata use the following steps
- Locate the Global JavaScript folder, create a new text file and name it “AutoMetadata.js”.
- Add the following text to the file-
app.addToolButton({ cName: "applyMetaData", cLabel:"MetaData", cEnable:"event.rc = (app.doc != null);", cExec: "this.info.author = \"Larry Squirrel\"});
- Save and close the file.
- Exit and restart Acrobat.
When Acrobat restarts it will load and run the single line of code in the file. This code passes 4 parameters into the Application Level function that adds a new button to the Acrobat Toolbar. The parameter cName is the name used in code to identify the button and cLabel is the text displayed on the face of the button. The last two parameters are both short JavaScript statements. The cEnable statement enables and disables (grays out) the button by setting the event.rc value. In this case the button is enabled only when a document is open in Acrobat. The cExec parameter is the code that runs when the button is pushed (sometimes referred to as the Action Script).
Open a PDF and push the new toolbar button. You’ve just saved yourself at least 14 keystrokes and 3 mouse clicks. To see the change open the Document Properties dialog (menu: File>Document Properties....). The Author property is located in the standard metadata, which is on the Description tab (Figure 2).
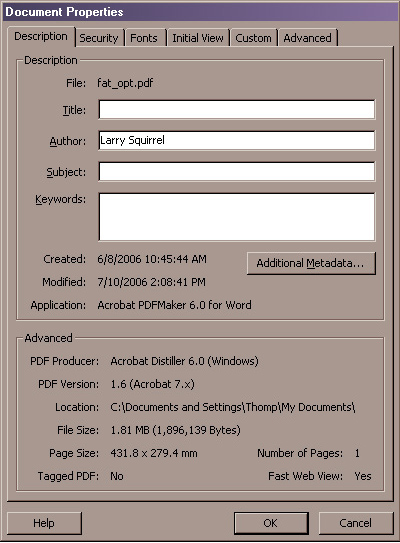
Figure 2 – Accessing metadata from the Acrobat user interface
This script works pretty well, but expanding the Action Script is going to be awkward if we have to keep adding text to the cExec parameter. The solution is to define a function that does the actual metadata updates, and then call this function from the Action Script. The code below changes several of the metadata entries using this technique. After modifying the AutoMetadata.js file Acrobat must be restarted. This is a very long turn around path, i.e., restarting Acrobat for every change you make in a Folder Level script. A faster way to try out code before going through this slightly painful cycle is to run the script from the JavaScript Console. But, if you do it this way you’ll also need to remove the previously created button before running the new code. Run the following line of code in the JavaScript Console to remove the button created with the previous test code.
app.removeToolbar("applyMetaData");
Now copy and paste the following code into the JavaScript Console.
function SetMetaData() { this.info.author = "Bill the Cat" this.info.copyright = "Copyright \xA9" + this.modDate.getFullYear() + "by MyCompany"; this.info.subject = "JavaScript"; } app.addToolButton({ cName: "applyMetaData", cLabel: "MetaData", cEnable: "event.rc = (app.doc != null);", cExec: "SetMetaData()"});
This script works a little better than the previous one. It sets three of the metadata entries and has a little flexibility in that it sets the copyright year to the current year. But more can be done such as setting the author and company names to the values in the Identity data (in Acrobat Preferences, on the Identity panel), and saving the file after the updates are made. These requirements make the button a very flexible and convenient tool, but they also present a problem. They all require a privileged context in which to operate, and the button’s Action Script is not privileged. This is also true for Menu Items in Acrobat 7.0 and later. To solve this problem we have to make the function trusted by putting it through the app.trustedFunction() function, as shown in the following code.
var SetMetaData = app.trustedFunction(function() {
    app.beginPriv();
    this.info.author = identity.name;
    this.info.copyright = "Copyright \xA9" + this.modDate.getFullYear() + " by "+ identity.corporation;
    this.info.subject = "JavaScript";
    this.saveAs(this.path);
    app.endPriv();
});

app.addToolButton({ cName: "applyMetaData", cLabel: "MetaData", cEnable: "event.rc = (app.doc != null);", cExec: "SetMetaData();"});
This script meets our requirements. It’s flexible enough to be given out to several document authors without any code changes and it automatically saves the document after the changes have been made. Notice that using the app.trustedFunction() function is not enough to actually make the code privileged. It is also necessary to bracket the code in the begin and end privileged markers, app.beginPriv() and app.endPriv().
Automating with a Batch Process
Batch Scripts are also Application Level, but have one big advantage over the toolbar button or menu item Action Scripts, they are already privileged. This means the trusted function used in the button script is unnecessary. The code for the Batch Script is identical to the code inside the SetMetaData()function, minus the privilege markers. To create a Batch Script use the following steps:
- Select the Advanced>Batch Processing... menu item to display the Batch Processing dialog.
- Press the New Sequence button, enter a name for the new Batch Sequence and press OK to display the Batch Sequence editing dialog.
- Press the Select Commands... button to display the Sequence editing dialog.
- Scroll down the command list to find the Execute JavaScript command. Select it and press the Add >> button to append it to the sequence.
- Edit the JavaScript for the command by double clicking on the Execute JavaScript command in the Batch Sequence list (the one on the right side of the dialog).
- Enter the following code
this.info.author = identity.name;
this.info.copyright = "Copyright \xA9" + this.modDate.getFullYear() + " by "+ identity.corporation;
this.info.subject = "JavaScript";
- Save and close the JavaScript editor.
- Click OK on the Sequence editing dialog. The Batch Sequence editing dialog should be the current dialog.
- Set up the files the Batch Sequence will be run on and press OK.
- The sequence is now ready to be run.
Automating with FDF
FDF is the original Acrobat native data format. It’s used primarily to transport form field data. However, it was designed for transporting a variety of PDF objects including annotations, images, digital signatures, pages, embedded files, and JavaScript. FDF files do not have a built-in feature specifically for modifying the document metadata, but since they can hold executable JavaScript a specific feature for this is not needed. Besides, scripting provides greater flexibility than a static metadata entry could.
FDF offers a variety of usage scenarios. For example, the FDF file can be created in one location and then emailed to the document producer in another location. The document producer simply imports the FDF into a document to update the metadata. FDF is a highly portable method for doing this update, but it is also much more restricted than the two methods discussed previously. JavaScript in an FDF operates in the context of the document. Since this is not a privileged context, we cannot use statements for example, that use the Identity parameters. FDF is intended for less flexible types of usage. Its major advantage is its portability.
Using a Server
Download an example file
Download <?php makeFileTypeLabel("PDF","281 KB"); ?>
Probably the most interesting and useful set of scenarios with FDF are operations over the internet. For example, a publisher is converting a large number of articles into PDF for distribution on a CD. The documents are scanned into PDFs and OCR’d. The publisher already has a set of data for each article in a database, and would like to automatically apply this data to the document metadata. Several people are working on the project in different locations. How do you set up a system where the different document producers can all use the central database to apply metadata to the documents they are working on?
Ideally, each producer would simply press a button on the Acrobat Toolbar to automatically update the file’s metadata. Or better yet, be able to run a batch process on a group of documents to achieve the same goal. The problem is that the metadata info is at a remote location. The solution is to use form submission. The process goes like this:
- A script in Acrobat collects information for identifying the article. Most likely this information would be extracted from the OCR text (a title or ID number).
- The ID data is transmitted to a server script using form submission.
- The server script acquires the article data from the database and builds an FDF for modifying the document. In this case, the FDF would contain a script that adds entries to the document metadata.
- The server returns the FDF to Acrobat.
- Acrobat applies the FDF contents to the current document. This action runs the JavaScript that in turn modifies the document metadata.
To make the example simpler lets assume the first word in each scanned document is a catalog number for the article. The script for submitting this information to the server is shown below. The script is executed by either an Acrobat Toolbar button or a Batch Script.
var strCatID = this.getPageNthWord(0,0); var strXML = “” + strCatID + “ ”; var oXID = XMLData.parse(strXML); this.submitForm({cURL: "http://www.mycompany.com/SetMetadata.aspx", cSubmitAs: “XML”, oXML: oXID});
The first line of the script acquires the first word in the document. This of course assumes the first word is what we intend to capture. A more typical situation would be finding a word at a particular page location such as the lower left corner. The next line uses this value to build an XML string. The third line creates an XML Object, and the last line of code submits the XML object to a server script.
The code for the server script is outside the scope of this article, but its main task is to build and return an FDF file similar to that shown in Figure 3 below.
%FDF-1.2 1 0 obj <</FDF &rt;<< /JavaScript << /Before 2 0 R /After (app.alert("Document Metadata is updated");) &rt;&rt; &rt;&rt; &rt;&rt; endobj 2 0 obj <<&rt;&rt; stream this.info.author = "Larry Squirrel"; this.info.copyright = "Copyright \xA9 2006 by WindJack Solutions"; this.info.subject = "JavaScript"; endstream endobj trailer << /Root 1 0 R &rt;&rt; %%EOF Figure 3 – FDF returned by the server, it contains only JavaScript
FDF is capable of containing several types of JavaScript. These include Document Scripts, Field Scripts, a script run Before the FDF is applied to the PDF and a script run After the FDF is applied to the PDF. In this case we are using the Before and After scripts.
Figure 3 demonstrates two ways JavaScript can be represented in the FDF file. The Before script references a Stream Object, which is useful for holding long scripts, and the After script uses a String Object, which is most useful for one line scripts.
The Before script contains the code for setting the document metadata entries. Since this information is built dynamically on the server side, the metadata values are mostly hard coded. There’s no need for the generalized scripting using programmable variables, as was used in the previous examples.
The document producers simply push a toolbar button or run a batch process. Scripting and the server take care of placing the correct metadata in each document.
Summary:
Using scripting to automate the application of metadata to a PDF can save time and reduce errors, especially when dealing with large quantities of similar PDFs. Acrobat JavaScript offers several different automation scenarios; toolbar buttons for modifying a single document, batch processes for modifying multiple documents, and FDF files for aiding in the creation of complex and internet based workflows.
Related topics: |
JavaScript |
Top Searches: |
Edit PDF create PDF Action Wizard |
Try Acrobat DC
Get started >
Learn how to
edit PDF.
Ask the Community
Post, discuss and be part of the Acrobat community.
Join now >
1 comment
Comments for this tutorial are now closed.
Lori Kassuba
3, 2014-12-30 30, 2014Hi Rae Benedetto,
You could do this using a plug-in but you don’t have access to the tagging structure using JavaScript.
Thanks,
Lori
Rae Benedetto
3, 2014-12-23 23, 2014Is it possible to edit the PDF Tags—the structure tags visible in the Tags Navigation Tab —using Javascript? I’d like to be able to make global changes such as changing all the <H3> tags to <H2>, not necessarily making changes to a specific tag.
Comments for this tutorial are now closed.