This tutorial shows you how to work with the Accessibility features in Acrobat 9. See what the all-new Acrobat DC can do for you.
Download a free trial of the new Acrobat.
Considering Acrobat 9 accessibility
Learn how to use the tools in Acrobat 9 to evaluate the accessibility status of existing content and make content accessible.


All federal government web content—including PDF files—has been accessible to persons with disabilities, such as vision and mobility impairments, for numerous years. Many organizations and businesses have followed suit. Acrobat 9 offers features for creating accessible content and evaluating existing PDF content for accessibility.
Acrobat 9 includes a number of tools for evaluating the accessibility status of existing content, making content accessible and optimizing accessible PDF files (Figure 1).
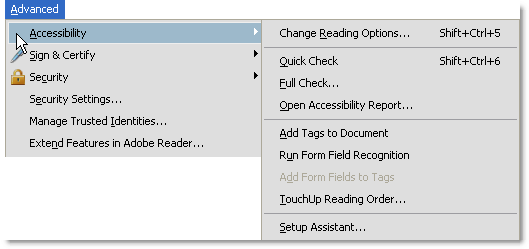
Figure 1: Acrobat 9 includes multiple tools for managing accessibility.
Rather than describing the basic processes for applying or evaluating accessibility, I’ll look at other considerations and features involved in making accessible content, such as working with tags, tables and forms.
Accessibility starts with tags
Tags allow Acrobat to manipulate the document and its contents in a variety of ways. Tags are a part of the document’s metadata and define relationships among elements, such as text, images, lists and tables.
Note: A tagged document isn’t the same as one containing a structure, such as this article. I’ve used a hierarchy of headings to define a flow for the pages, which isn’t as complete as a tagged file.
Tags may be applied in some source programs, such as InDesign or Word (using a PDFMaker), or in Acrobat using the Advanced > Accessibility > Add Tags to Document command. In Acrobat, view the tag hierarchy in the Tags panel.
Regardless of the source of a document’s tags, you may not have the clear, simple tagging structure you see in Figure 2. In this example, you see the Table of Contents items tagged in a tree structure. Each item includes a label, title, and a linked page, wrapped in a Table of Contents Item (TOCI) tag.
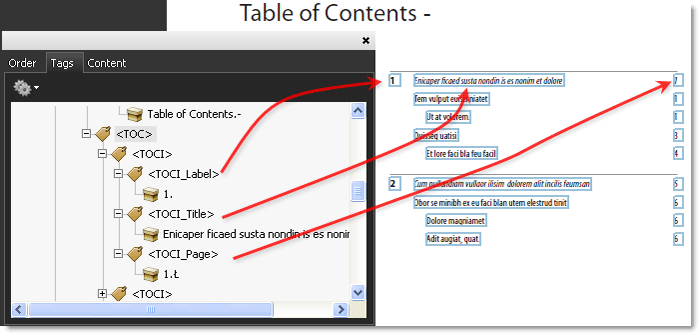
Figure 2: Tags define the Table of Contents elements.
Changing tag properties
Simply tagging a document doesn’t produce a finished product, although the tags may be technically accurate. If you’re comfortable using tags, select the tag in the tag tree, click it again to activate the text, and type your replacement tag.
The Tags panel’s menu contains a variety of commands to configure or modify the tag tree. Figure 3 shows several tags from a file converted to PDF from a source Word document.
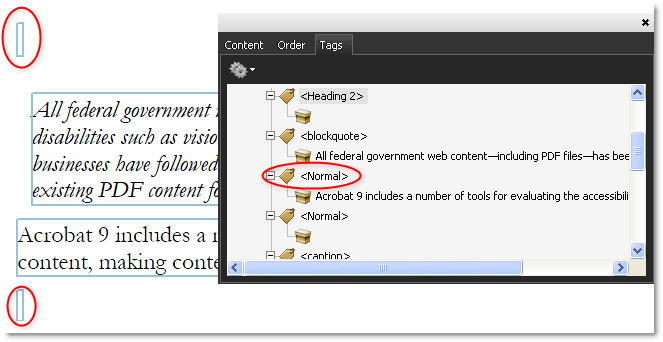
Figure 3: Evaluate the page for tagging issues.
Looking at the tags, you’ll see that:
- The Heading 2 tag has no associated content as the source document used an extra line with the style attached for layout purposes
- Another blank line has been added, again for layout purposes
- The paragraphs use a tag based on the style identified in the source document rather than using the proper container
tags
Select the tag in the Tags panel, and use the keyboard or commands from either the Options menu or the shortcut menu to modify the tags for accessible use. In the finished product, although the spacing remains on the page, a screen reader wouldn’t read the blank heading or paragraph.
Note: The paragraphs use the style imported from the source Word document’s style. Acrobat uses the class, attributes and document role associated with a paragraph, as you can see by opening the Class Map and Role Maps, available via the Options menu commands.
Reorder tags or remove them altogether in the Tags panel. In the next example, the source file’s headings used numbering, converted to a set of list tags (Figure 4).
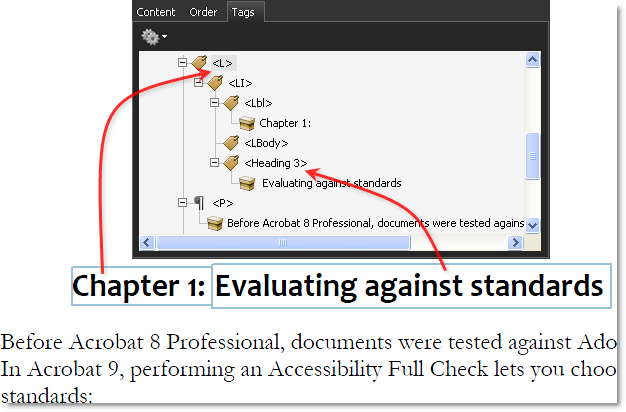
Figure 4: Correct tags in the panel.
In the example shown in Figure 4, the parent tag, Chapter 1, includes the tag as a child. Click and drag a tag’s label in the panel to modify the hierarchy as desired (Figure 5). You’ll see a horizontal line indicating the location for the tag, and can reorder the tag and promote or demote its dependency. Once you’ve got the tags reordered, you can delete the superfluous list tags.

Figure 5: Reorder and delete tags as necessary.
Tip: If you want to keep the content visible, but not captured by a screen reader, change it to an artifact. Select the content in the tag tree, and choose Change Tag to Artifact from the shortcut or Options menu.
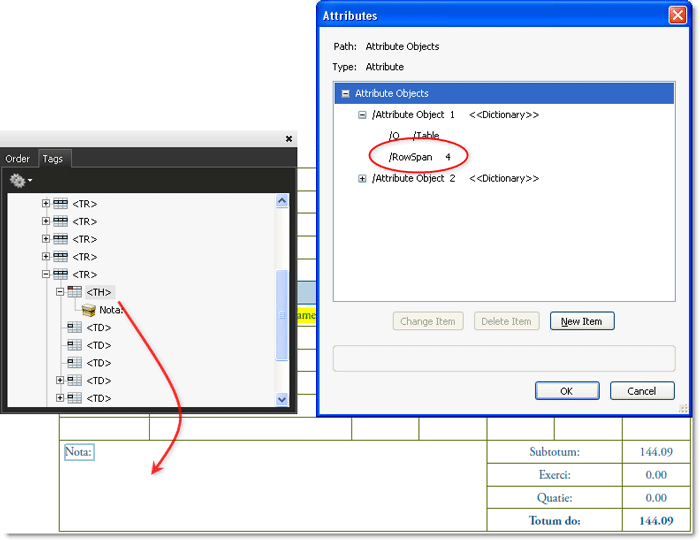
Handling tables
How many times have you tried to evaluate data in a multi-page table without the benefit of column headers? Or found yourself scrolling continuously to identify the meaning of a cell’s contents? Contrast that with a simple table presented on a page with clearly defined elements, such as Table 1.
Element |
Tag |
Description |
||||||||||||||||
|
Table |
|
Products covered: |
Acrobat 9 |
Related topics: |
Accessibility |
Top Searches: |
PDF accessibility convert PDF to Word create PDF |
Try Acrobat DC
Get started >
Learn how to
edit PDF.
Ask the Community
Post, discuss and be part of the Acrobat community.
Join now >
0 comments
Comments for this tutorial are now closed.
Comments for this tutorial are now closed.