This tutorial shows you how to work with the Scan and Optimize features in Acrobat 9. See what the all-new Acrobat DC can do for you.
Download a free trial of the new Acrobat.
Understanding Acrobat 9’s Optimizer
Learn the benefits of the PDF Optimizer in Acrobat 9 for a business-desktop audience.
By Duff Johnson – July 31, 2009

NOTE: All menu references relate to Adobe Acrobat Professional 9
Users of Adobe Acrobat Professional have a variety of reasons to become familiar with the PDF Optimizer (Advanced > PDF Optimizer). From debugging problem PDF documents to reducing file size and enhancing online performance, the Optimizer is a smart last step before securing and deploying your PDF files. This article introduces the value, rationale and benefits of the Optimizer for a business-desktop audience.
First, do no harm
Let's start with a little warning: The PDF Optimizer is a collection of powerful document-modifying capabilities, and it works very quickly. Acrobat's Batch Processing (Advanced > Document Processing > Batch Processing) feature makes it possible to run the Optimizer on hundreds or even thousands of files at a time. For this reason, you need to be VERY CAREFUL with Optimizer settings; it's all too easy to lose or degrade precious work.
The simple, basic safety rule is this: Never optimize a "live" file. Always make a copy of anything you plan to optimize, and work only on the copies so that you are free to throw away your test files at any time. Follow that rule, and you can pick the most swashbuckling Optimizer settings you like!
Why would I need it?
The typical use of the Optimizer is for polishing PDF files prior to distribution on a website or by e-mail. It's great for removing unnecessary information and reducing file size. As already noted, the Optimizer may be operated as part of a batch process, and it's common to use this opportunity to set file-open options, metadata and other parameters, all in a single operation.
The PDF Optimizer has many functions, but much of the terminology is pretty cryptic and/or ambiguous. Make sure you understand the settings in your own terms before you optimize every PDF file on your website.
For example, the Discard Objects settings include a checkbox for "Flatten form fields." Carelessly include this option, and you will destroy any PDF form you optimize.
Here's how the PDF Optimizer can help:
- Auditing PDF files for the relative proportions of various types of content within the file. This is especially useful when attempting to understand the (huge) contribution of images and fonts to a given PDF document’s file-size, which can also suggest strategies for dealing with the problem.
- Reduce file size through image downsampling and recompression using JBIG2 and JPEG2000.
- Reduce file size by unembedding and subsetting fonts.
- Manage transparency settings, generally of little interest to business users, but sometimes there's a file-size savings.
- Reduce file size through the removal of a variety of objects and "user-related" data, most of which isn't user-related. Sounds dangerous, and it is.
- Ensure compatibility with older versions of Reader, a vital consideration for files intended for very general distribution.
What's NOT in the PDF Optimizer:
- Scanned image processing (see the Document > Optimize Scanned PDF and Document > OCR Text Recognition menus).
- PDF Standards compliance (see Advanced > Preflight).
- Colorspace control (see Advanced > Preflight).
- Other advanced print production controls (see Advanced > Preflight).
Start with an Audit
It's a good idea to begin with a sense of how the different elements of your PDF documents contribute to the overall size of the files. Before looking at the Optimizer functions, spend a moment with the handy Audit Space Usage tool at the top-right of the Optimizer window.
You'll quickly find that images are generally the biggest file-size culprits, but there are other cases where fully embedded fonts or other extraneous data (which the Optimizer can often remove) will comprise half or sometimes even more of a file's size.
Version Compatibility
Next, you need to choose which version of Acrobat or Adobe Reader to support. Not all users can simply update their computers to the most recent released version of Reader if and when they feel like it, so for general distribution purposes, you need to allow for users with older software. Since older versions of Acrobat and Reader can't support some of the newer capabilities of PDF, selecting compatibility with older software restricts certain Optimizer functionality.
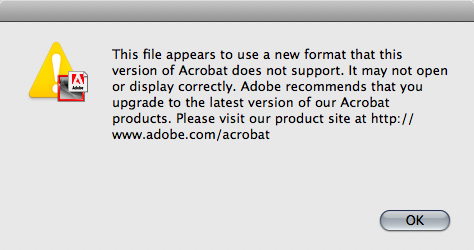
One key reason to address version compatibility is the warning when opening a newer file. If, for example, PDF files are set to Acrobat 8 compatibility, someone opening the file in Reader 6 will get a message that begins: "This file appears to use a new format that this version of Acrobat does not support." Users must click "Ok" to make the message go away, each and every time they open the file. It's confusing and annoying.
Some organizations still require Acrobat 5 (PDF 1.4) compatibility, and a few (some in Big Pharma come to mind) still require Acrobat 4 compatibility. However, that doesn't mean you should select these options. When preparing files for general distribution (i.e. intended for a website), choosing Acrobat 6 compatibility is a reasonable compromise, as it allows both JBIG2 and JPEG200 compression -- vital if you are processing scanned documents -- and accommodates the vast majority of end-users.
The PDF Optimizer, panel by panel
The Optimizer's functions are arranged into six panels, each of which may be turned off and on via a checkbox.
- Images
- Fonts
- Transparency
- Discard Objects
- Discard User Data
- Cleanup
The Optimizer includes the ability to save any configuration from all of these panels as a single preset. This is invaluable, since once you've found a given collection of settings that's right for your task, you'll want to save that configuration for future work or for batch processing.
Each panel is briefly profiled below, along with some basic recommendations on usage.
Images
This panel manages the output resolution and compression of raster images. The best and most consistent results in terms of balancing image quality with file size are achieved through mastery of this panel.
For file-size savings on scanned documents, check out the advanced compression options; JBIG2 (for black-and-white scanned pages) and JPEG2000 (for color graphics and photographs).
Suggestions:
- Use a minimum color and grayscale image resolution of 144 dpi. At lower resolutions, print quality becomes seriously compromised. Lower the resolution to 72 dpi only if all other attempts at file-size reduction have failed. As long as your color images are mostly photographs, you should be ok.
- Avoid downsampling monochrome images to less than 300 dpi. Use lossy JBIG2 compression instead; it's great for reducing the file size of black-and-white scans.
- For scanned pages, consider the ClearScan conversion option, new in Acrobat 9 (Document > OCR Scanned Pages).

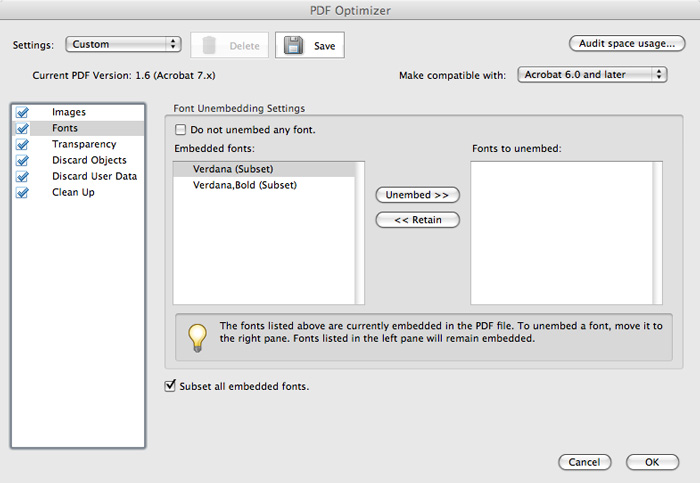
Fonts
This panel allows users to unembed and/or subset fonts to save file size. This can be particularly relevant in smaller documents, where it's common to see a very high proportion of the file size (sometimes 30 percent or more) taken up by font information. I've seen 640 MB CD-ROMs of PDF files that included more than 200 MB devoted to fonts.
Subsetting is a great way to reduce the size of font data to the minimum required for accurate representation of the original document. Be aware, however, that text displayed in an unembedded or subsetted font cannot be modified in Acrobat.
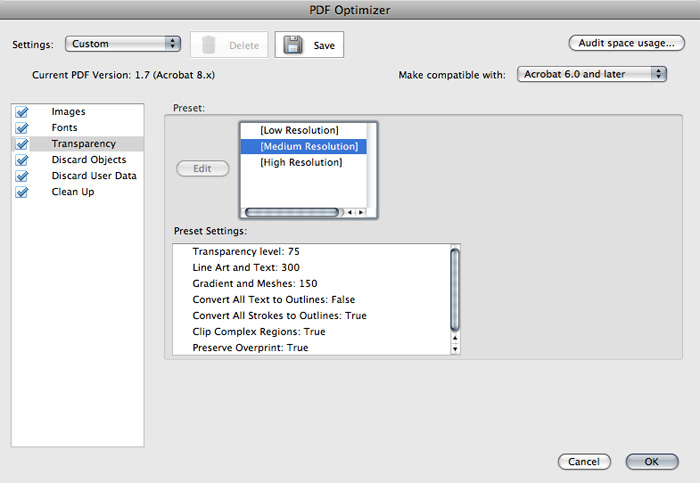
Transparency
Generally intended for print-production purposes, this panel doesn't offer much for business users of Acrobat. If you think your PDF file contains complex vector graphics that include transparency, go ahead and activate this panel. Select the "Medium Resolution" option, and with some PDF documents, you may see a file-size reduction.
Discard objects
Select these items with care! There's very little by way of file size to be saved using the options on this panel, and it's possible to do considerable damage if these options are selected.
The top three options are only useful when you KNOW you want to affirmatively perform these actions as part of some sort of archiving process, or if you don't care in the slightest about any live forms or JavaScript surviving the process.
The rest of the options can produce minor reductions in file size, but some settings should be used with great care. Discarding document tags, for example, might throw away hours and hours of someone's careful work to ensure accessibility. Bookmarks, when present, are usually present for a reason -- the author considered them important for navigating the document. Even embedded page thumbnails, with a direct cost on file size, sometimes have a purpose, because thumbnails provide a way to quickly navigate specific types of content, and are sometimes embedded for that reason.

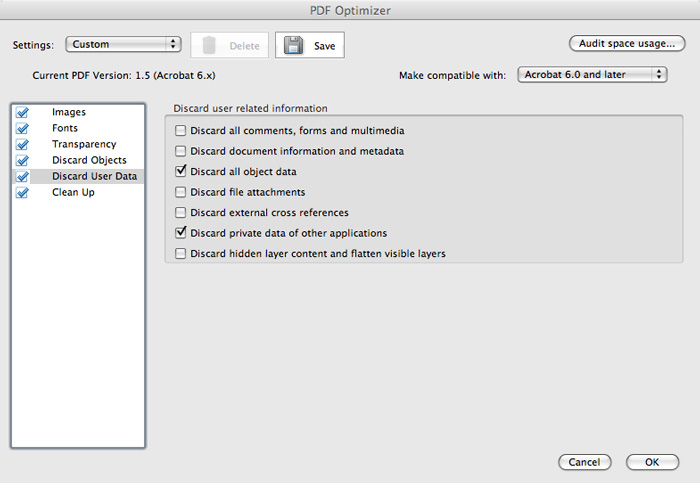
Discard User Data
Now we come to the misnamed "Discard User Data" panel. It really should be called the "Discard Author Data" panel, and it's mostly technical and boring. There are some exceptions.
Lumping Comments and Forms together, for a start, is just wrong, but at least now you know that you can kill both form fields and notes (under the hood, they are just two species of "annotation") with a single checkbox. Want to delete JUST the notes, and NOT the form fields, or maybe the other way around? Too bad.
If you happen to be the document creator, checking "Discard document information and metadata" will ensure that your file is purged of any memory of you as the author, plus whatever other metadata your authoring application included, or had been subsequently added. Think about it before you dump metadata. The file-size improvement is miniscule, and the world already has too many PDF files without even basic metadata. Distributed PDF files should contain at least Title and Author entries; any users trying to find your PDF using a search engine will really appreciate it.
Cleanup
In this panel, object compression options change according to the selected Acrobat Compatibility specification you choose for compatibility. Requiring Acrobat 5 compatibility will restrict your compression options. In general, choose "Compress the entire file."
Feel free to check all the boxes on this panel. The one that really matters is Optimize for Fast Web View. This option allows PDF files to be viewed in the browser plugin as they are downloaded, permitting rapid online viewing of extremely large PDF files. Be sure this is checked for almost any PDF document.
For PDF forms, however -- especially those with lots of JavaScript -- it's generally a better practice to NOT optimize for Fast Web View.

Conclusion
These screenshots show good starting settings for almost all PDF files intended for online use. Your mileage and preferences may vary. Begin by auditing some of your PDF files ahead of time so you understand the relative size of what's inside a particular document.
If you need very high resolution or minimal compression in order to convey a high level of image detail, change the image settings accordingly.
Finally, be sure that optimizing is the LAST thing you do before securing and posting your PDF files online. Any other edits or saves in Acrobat 9.0 may automatically "upgrade" the file, causing users with older software to see that nasty message about the file being "unsupported."
Good luck, and happy Optimizing!
Products covered: |
Acrobat 9 |
Related topics: |
Compress PDF online, Scan and Optimize |
Top Searches: |
Compress PDF onlineCreate PDF convert scanned documents to PDFs get started with Acrobat DC |
Try Acrobat DC
Get started >
Learn how to
edit PDF.
Ask the Community
Post, discuss and be part of the Acrobat community.
Join now >
0 comments
Comments for this tutorial are now closed.
Comments for this tutorial are now closed.